Setup Guide
In order to generate credentials, you’ll first need a Zoom Account. So, sign up if you don’t have a Zoom account already or just sign in with your existing Zoom Account and follow the next steps.
Creating Server to Server App type
- Goto Zoom Marketplace page from https://marketplace.zoom.us/
- Now, you will need to create a “Server-to-Server” App type from here.
- Hover on Manage dropdown and select “Build Server-to-Server App like shown in below image.
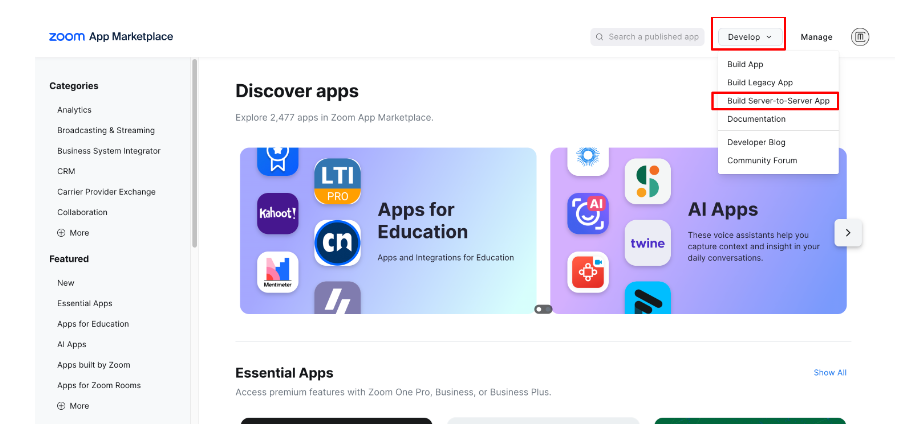
OR you can simply click this https://marketplace.zoom.us/develop/create and this will open a modal like in below screenshot.
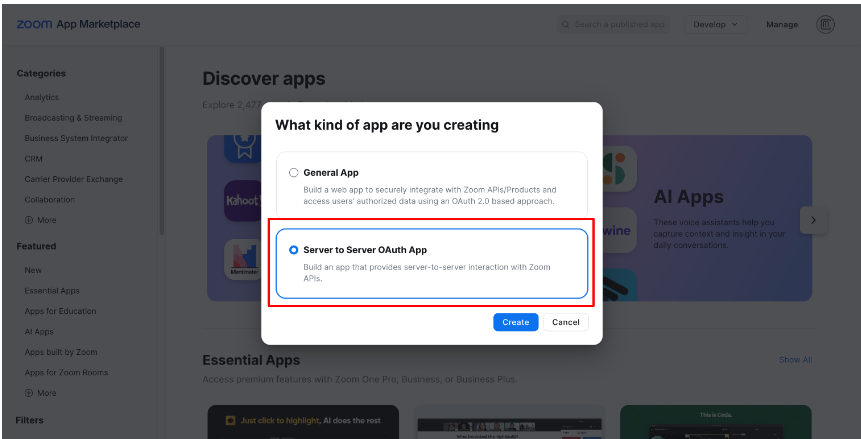
Click on Server to Server OAuth App and click create.
Setting Up API Credentials:
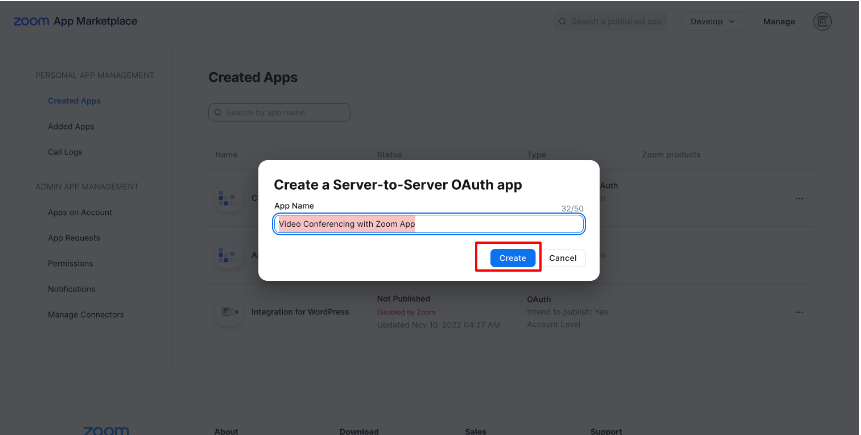
After you click on “Create” button in the popup you will be asked few details to fill up.
1. App Name
Add your app name to anything of your Preference so that you can remember that this app type is for your WordPress website.
2. App Credentials
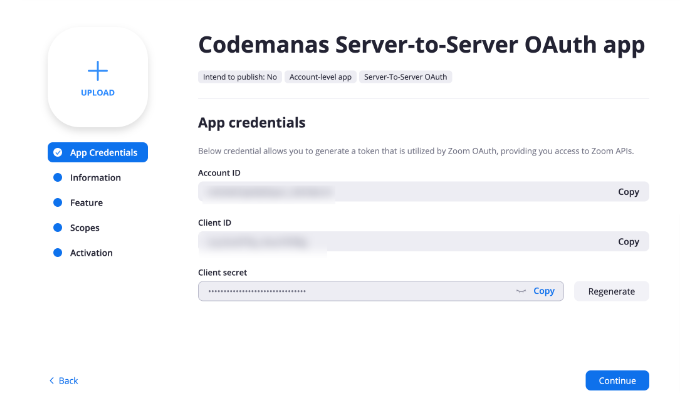
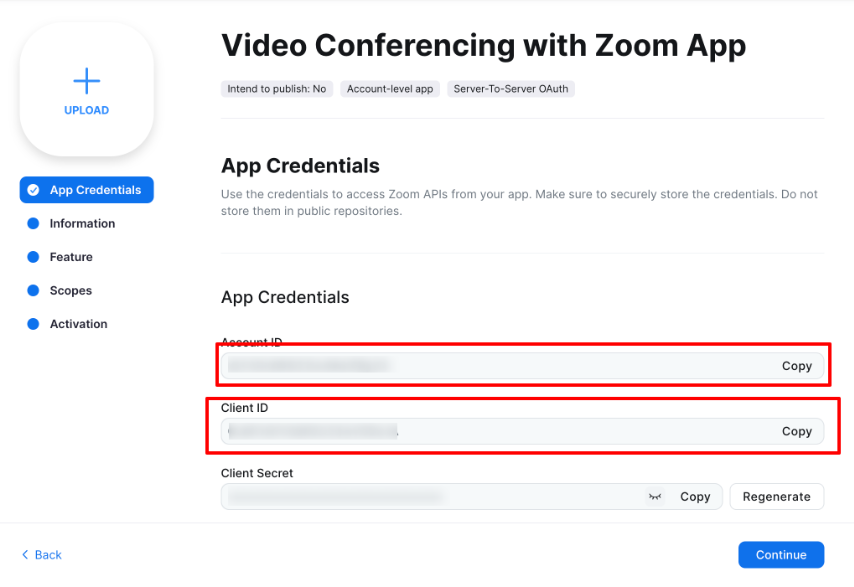
Once App is created – you will be taken to an App Overview page where you can see App Credentials. These highlighted credentials will be used in our WordPress Video conferencing Zoom plugin to connect with your account. We’ll get back to this in next steps. Click Continue for now.
3. Information Page
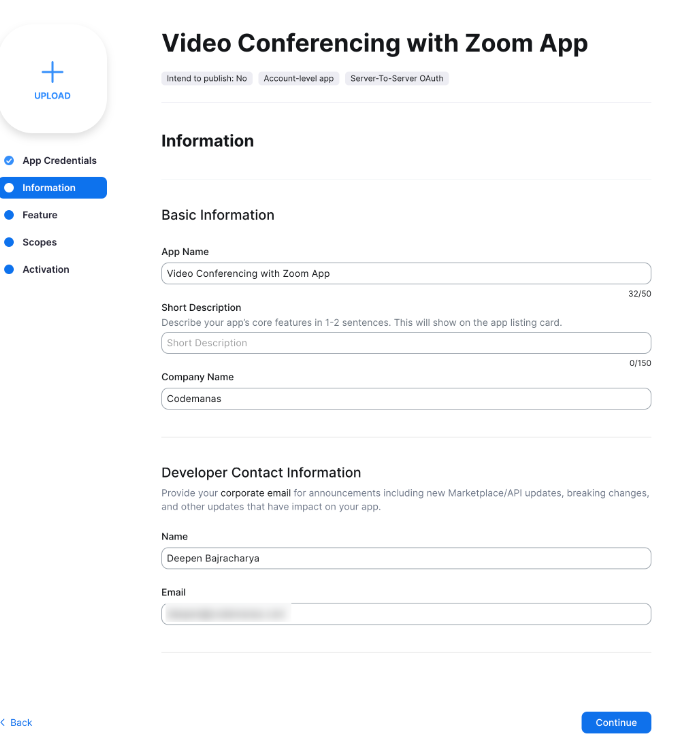
In this next step you will need to add Contact name, Contact email and Company name on the information page in order to activate this app type. Fill in the details according to your needs.
4. Scopes Page
Ignore “Feature” page – After you’ve added details from previous step – Goto Scopes page from the left navigation menu and Click on “Add Scopes” as highlighted in the screenshot.
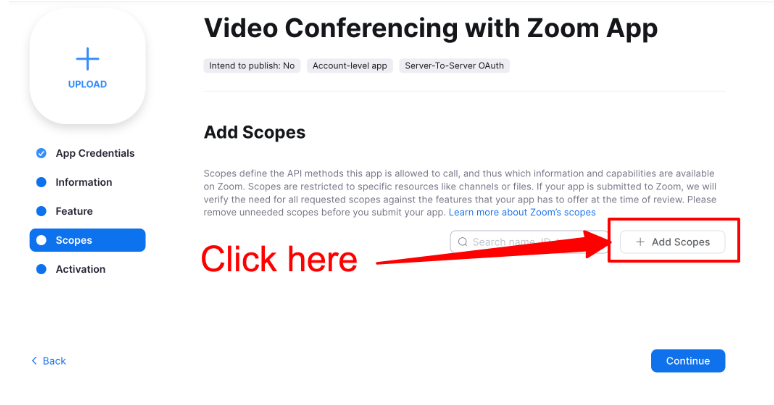
Scopes are basically added in order to allow permissions to access your Zoom meetings into Video Conferencing Zoom plugin. So, this step is very crucial step and you should properly assign each of the defined scopes properly otherwise you will get no permission issues when trying to create,delete or access Zoom Meetings from your WordPress site.
Required Scopes:
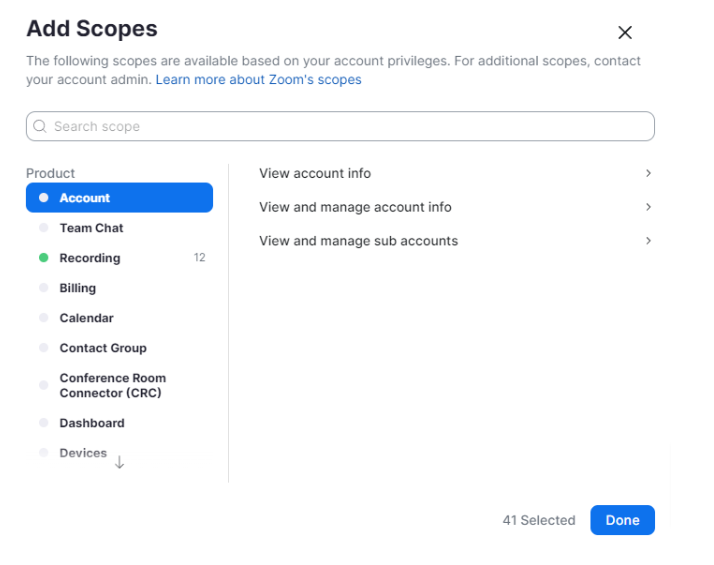
These below are the scopes required from step 4 when setting up the scopes for your application.
Note: Not adding any of the below permissions may result in permission issue error notices when trying to create your meeting/webinars.
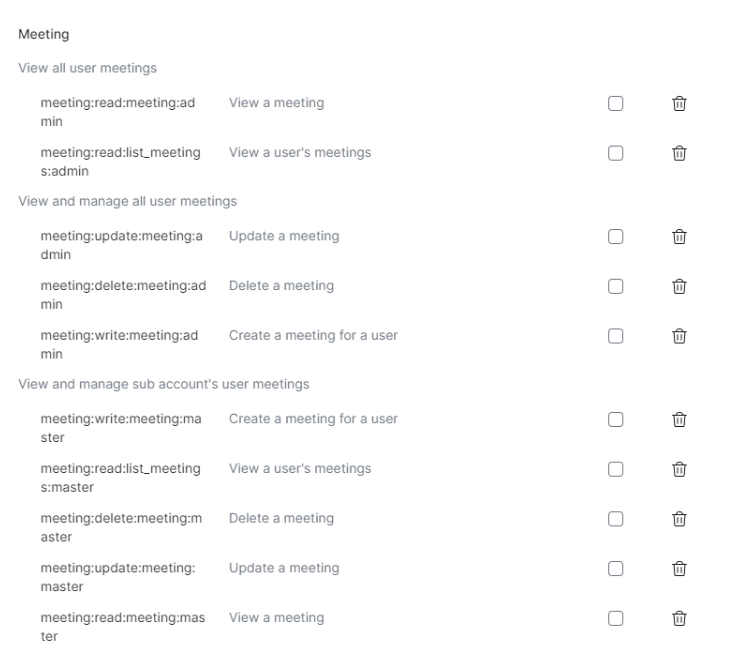
Meetings
-
- View all user meetings
-
- View a meeting/meeting:read:meeting:admin
- View a user’s meetings/meeting:read:list_meetings:admin
-
- View all user meetings
-
- View and manage all user meetings
-
- Update a meeting/meeting:update:meeting:admin
- Delete a meeting/meeting:delete:meeting:admin
- Create a meeting for a user/meeting:write:meeting:admin
-
- View and manage all user meetings
-
- View and manage sub account’s user meetings/meeting:master
-
- Create a meeting for a user/meeting:write:meeting:master
- View a user’s meetings/meeting:read:list_meetings:master
- Delete a meeting/meeting:delete:meeting:master
- Update a meeting/meeting:update:meeting:master
- View a meeting/meeting:read:meeting:master
-
- View and manage sub account’s user meetings/meeting:master
Recordings
-
- View all user recordings/recording:read:admin
-
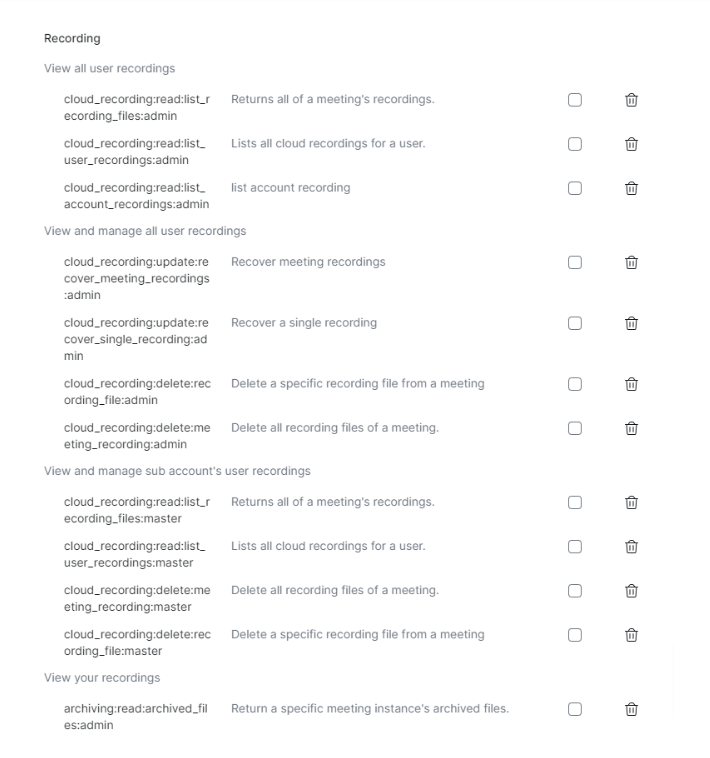
- Returns all of a meeting’s recordings/cloud_recording:read:list_recording_files:admin
- Lists all cloud recordings for a user/cloud_recording:read:list_recording_files:admin
- list account recording/cloud_recording:read:list_account_recordings:admin
-
- View all user recordings/recording:read:admin
-
- View and manage all user recordings/recording:write:admin
-
- Recover meeting recordings/cloud_recording:update:recover_meeting_recordings:admin
- Recover a single recording/cloud_recording:update:recover_single_recording:admin
- Delete a specific recording file from a meeting/cloud_recording:delete:recording_file:admin
- Delete all recording files of a meeting/cloud_recording:delete:meeting_recording:admin
-
- View and manage all user recordings/recording:write:admin
-
- View and manage sub account’s user recordings/recording:master
-
- Returns all of a meeting’s recordings/cloud_recording:read:list_recording_files:master
- Lists all cloud recordings for a user/cloud_recording:read:list_user_recordings:master
- Delete all recording files of a meeting/cloud_recording:delete:meeting_recording:master
- Delete a specific recording file from a meeting/cloud_recording:delete:recording_file:master
-
- View and manage sub account’s user recordings/recording:master
-
- View your recordings
-
- Return a specific meeting instance’s archived files/archiving:read:archived_files:admin
-
- View your recordings
Reports
-
- View report data
-
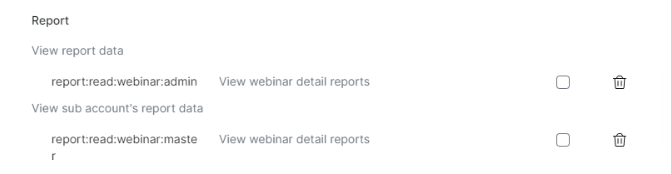
- View webinar detail reports/report:read:webinar:admin
-
- View report data
-
- View sub account’s report data
-
- View webinar detail reports/report:read:webinar:master
-
- View sub account’s report data
Users
-
- View all user information
-
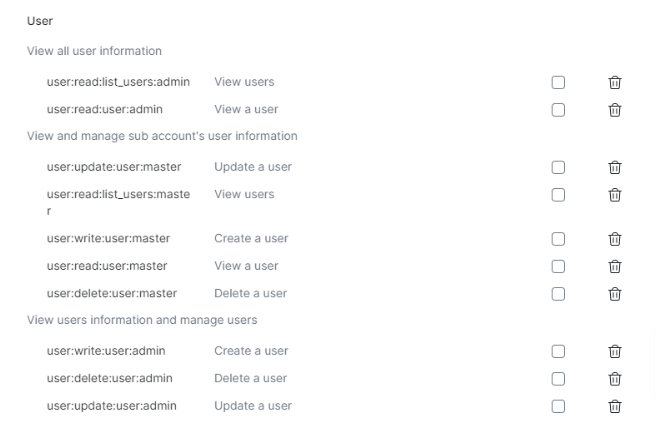
- View users/user:read:list_users:admin
- View a user/user:read:user:admin
-
- View all user information
-
- View and manage sub account’s user information
-
- Update a user/user:update:user:master
- View a user/user:read:user:master
- Create a user/user:write:user:master
- View users/user:read:list_users:master
- Delete a user/user:delete:user:master
-
- View and manage sub account’s user information
-
- View users information and manage users
-
- Create a user/user:write:user:admin
- Delete a user/user:delete:user:admin
- Update a user/ user:update:user:admin
-
- View users information and manage users
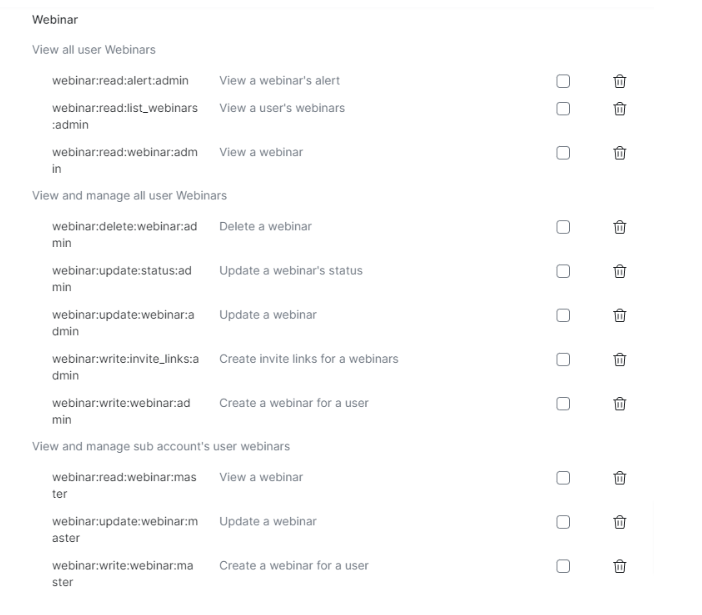
Webinars
-
- View all user Webinars
-
- View a webinar’s alert/webinar:read:alert:admin
- View a user’s webinars/webinar:read:list_webinars:admin
- View a webinar/webinar:read:webinar:admin
-
- View all user Webinars
-
- View and manage all user Webinars
-
- Delete a webinar/webinar:delete:webinar:admin
- Update a webinar’s status/webinar:update:status:admin
- Update a webinar/webinar:update:webinar:admin
- Create invite links for a webinars/webinar:write:invite_links:admin
- Create a webinar for a user/webinar:write:webinar:admin
-
- View and manage all user Webinars
-
- View and manage sub account’s user webinars
-
- View a webinar/webinar:read:webinar:master
- Update a webinar/webinar:update:webinar:master
- Create a webinar for a user/webinar:write:webinar:master
-
- View and manage sub account’s user webinars
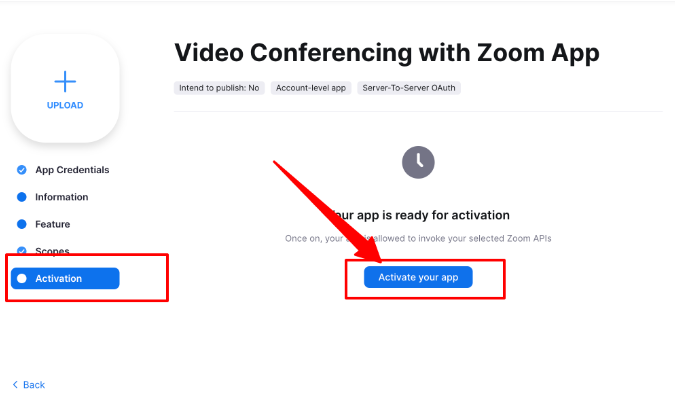
5. Activation
Finally, click on Activate your App button and your activated.
Adding Server-to-Server OAuth Credentials to the doctors page
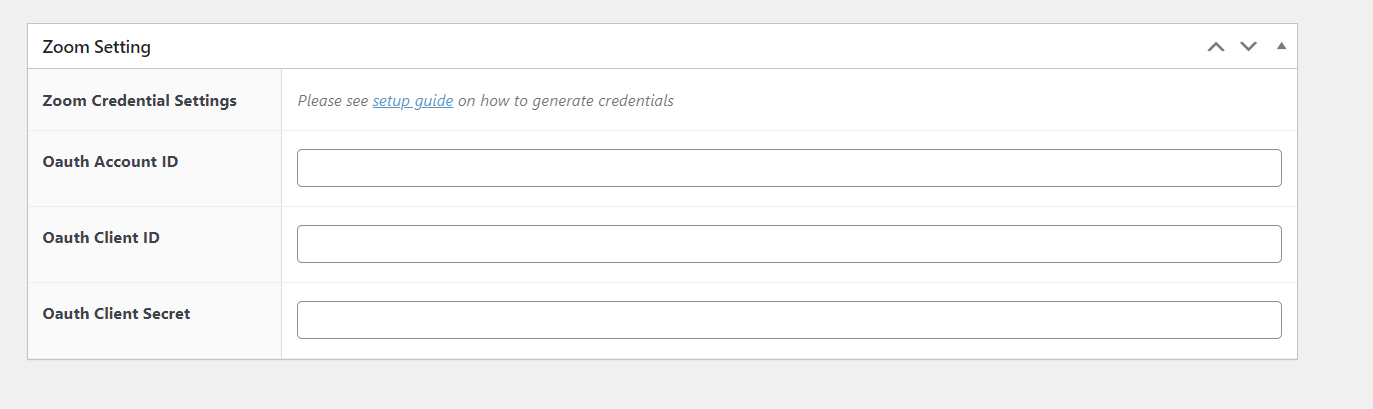
Add the Server-to-Server credentials ( Account ID, Client ID, Client Secret ) that can be viewed in the app under credentials (see step 2 above from Setting up API credentials step)