
Setup Google Calendar API
Register an app with the Google Developer Console and obtain your Client ID and Client Secret. credentials. For this, do the following.
Creating Server to Server App type
- Go to the Google Developers Console.
- Choose “New project” or “Select a project” if you have got active ones.
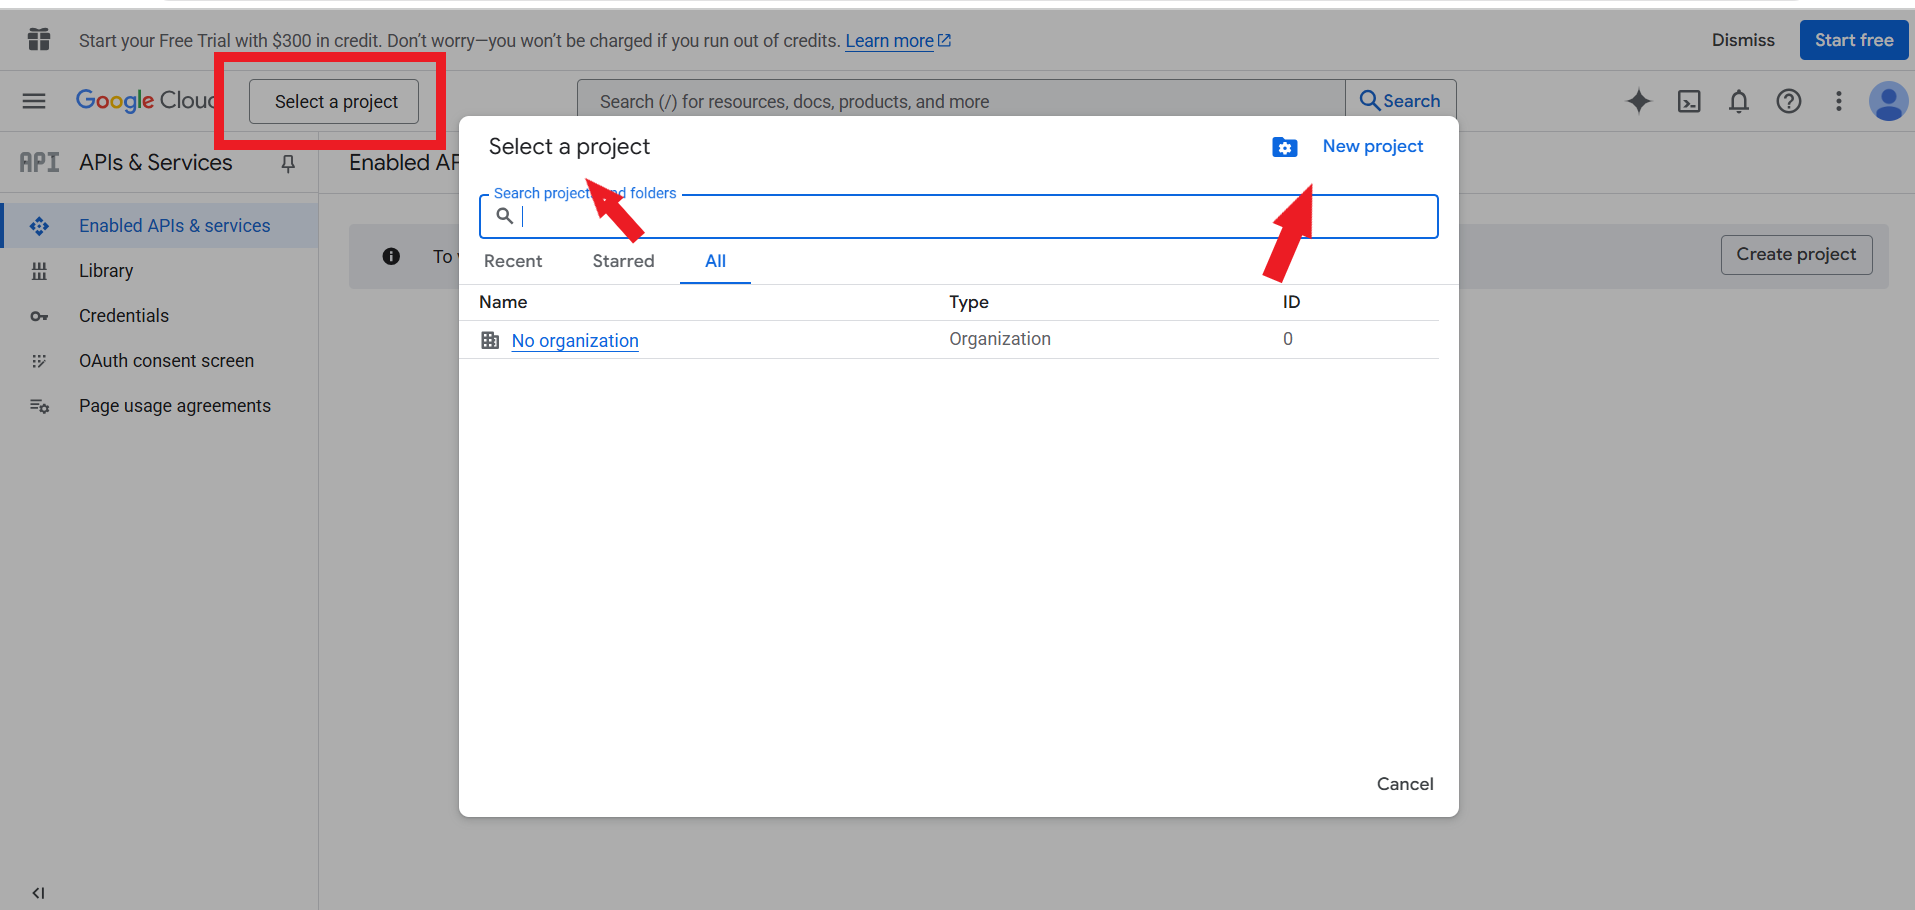
3. For a new project, fill in the fields like below and click ‘Create’.
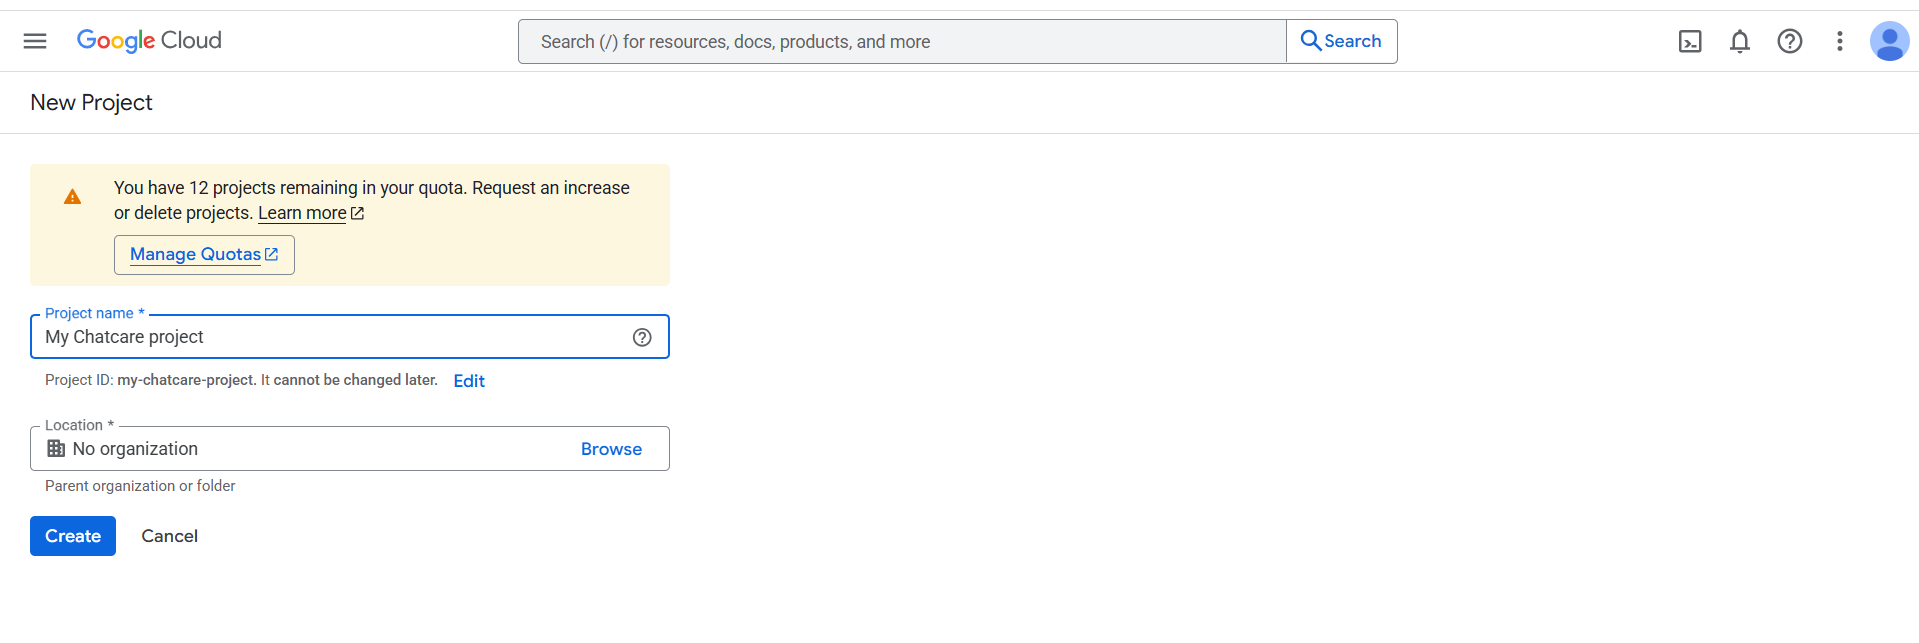
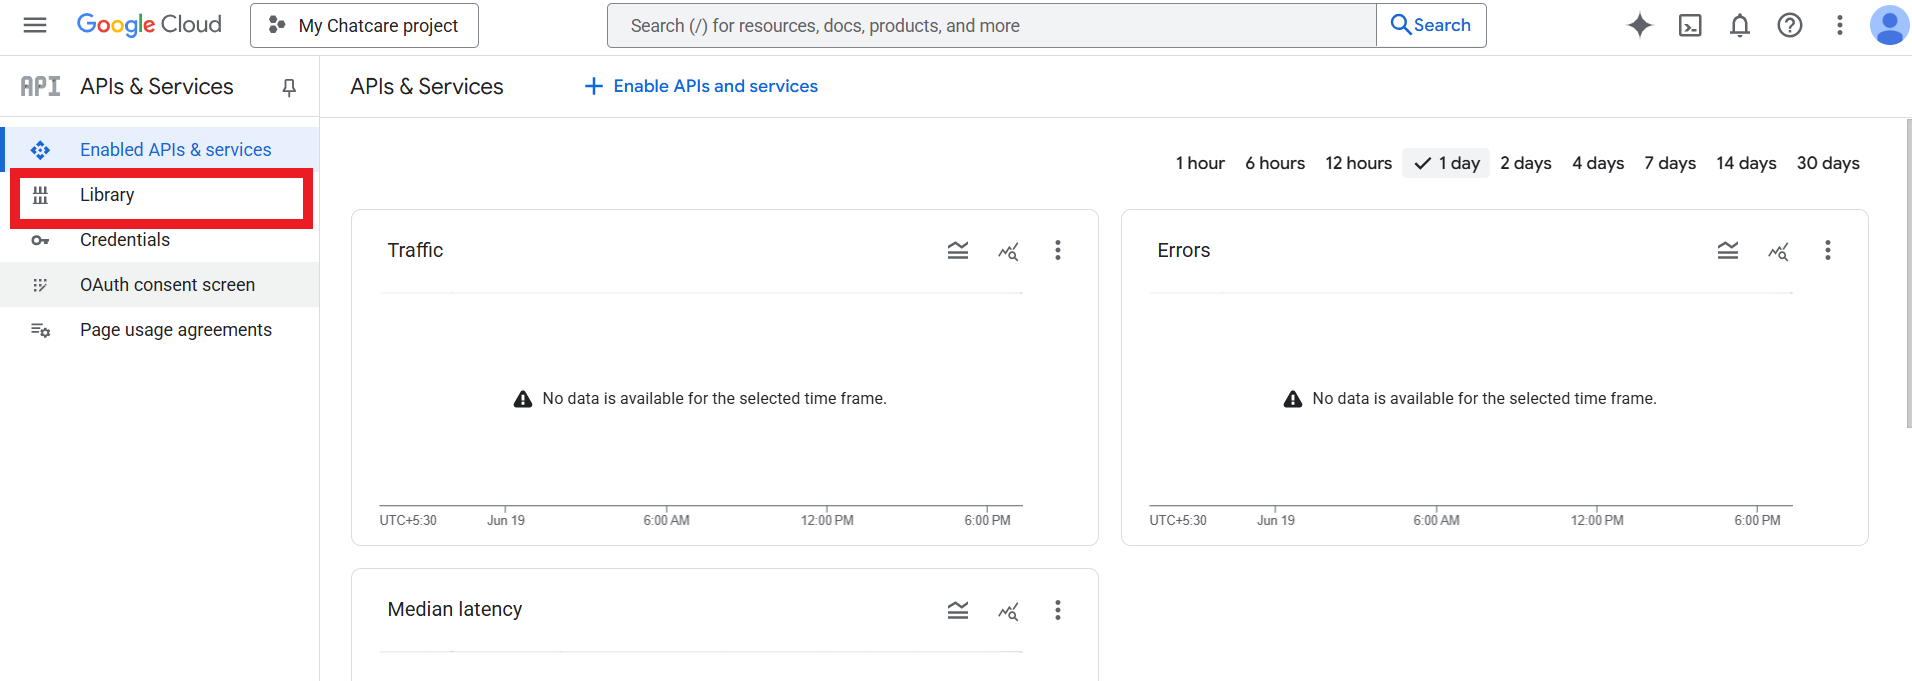
4. Wait to be redirected to the project dashboard.
5. Go to “Library” in the dashboard from the left.
6. Scroll down to find Google Calendar API and select it.
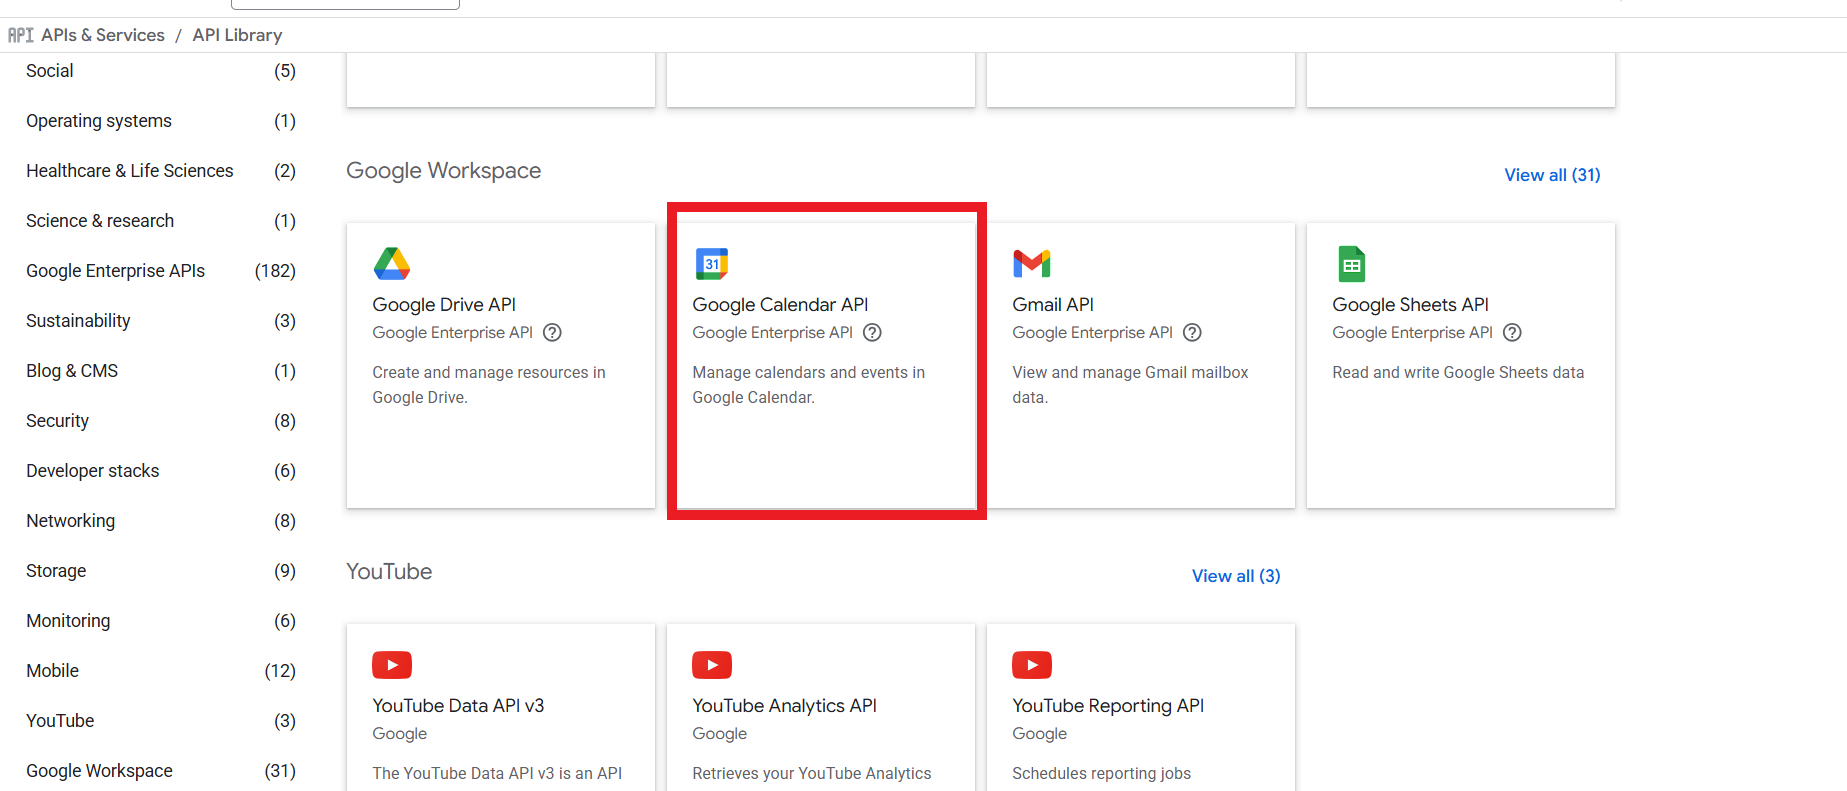
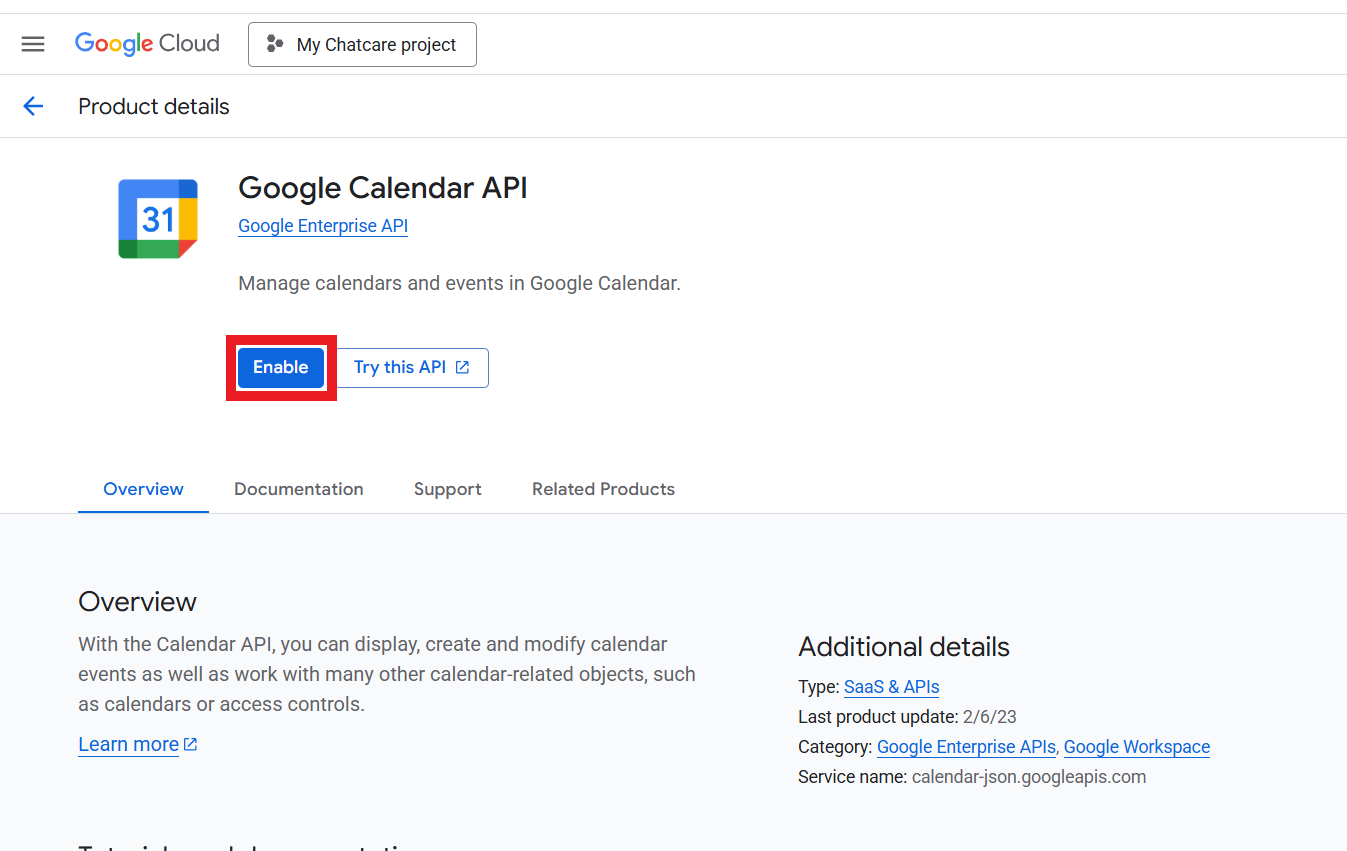
7. If it’s disabled, click Enable, then follow steps 8–21, and continue to step 27. If it’s already enabled, you can skip to steps 22–26.
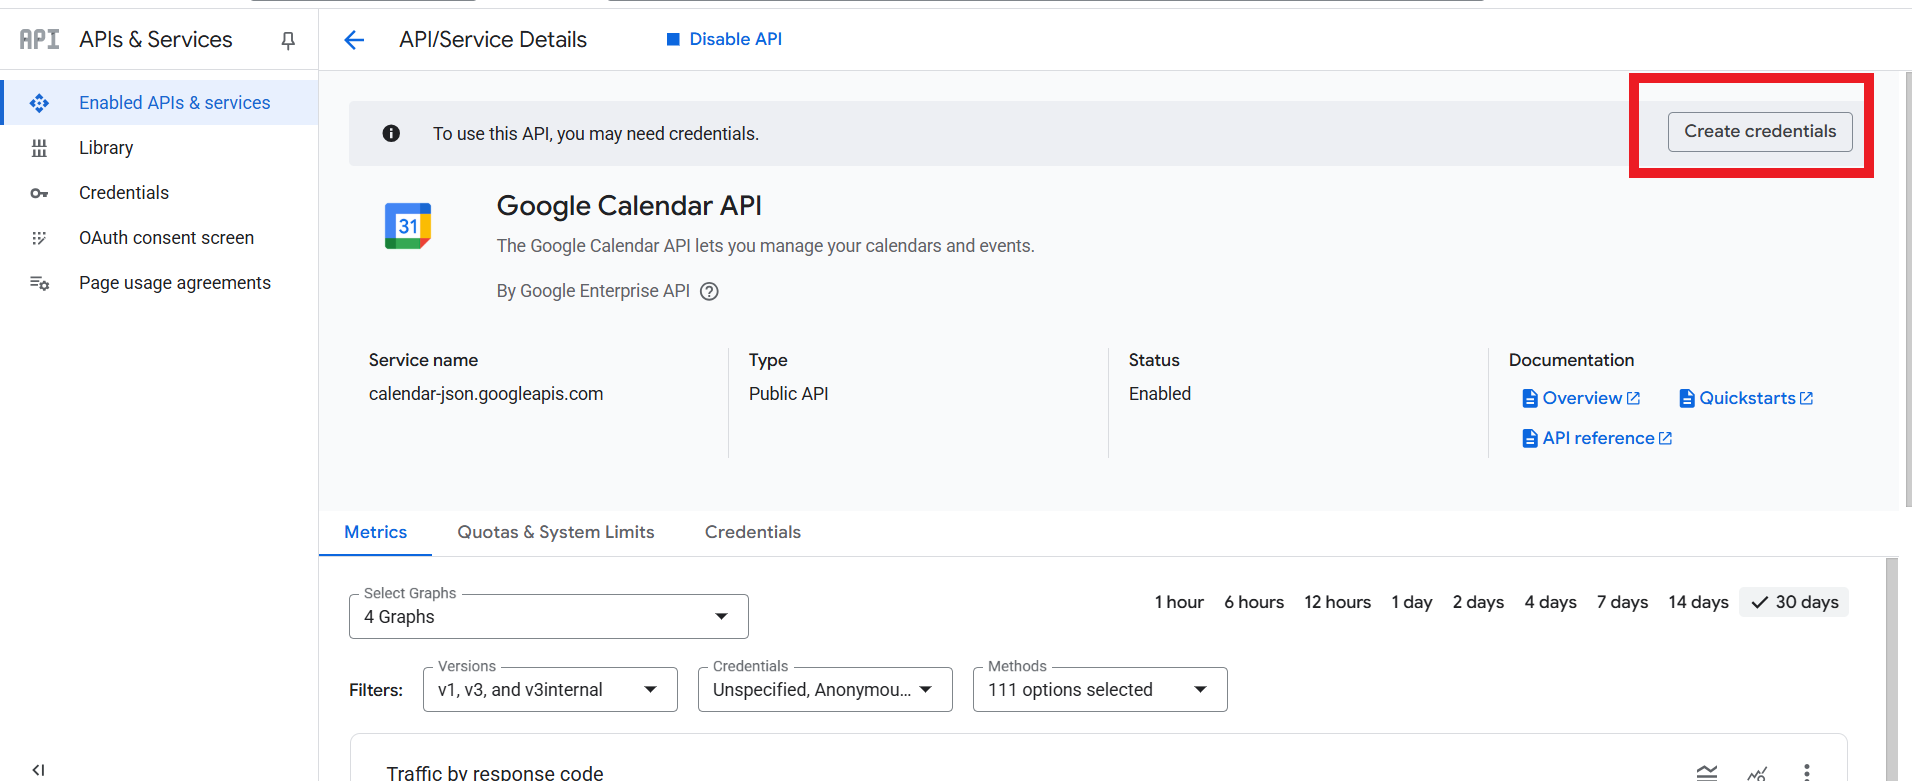
8. Hit the ‘Create credentials’ button.
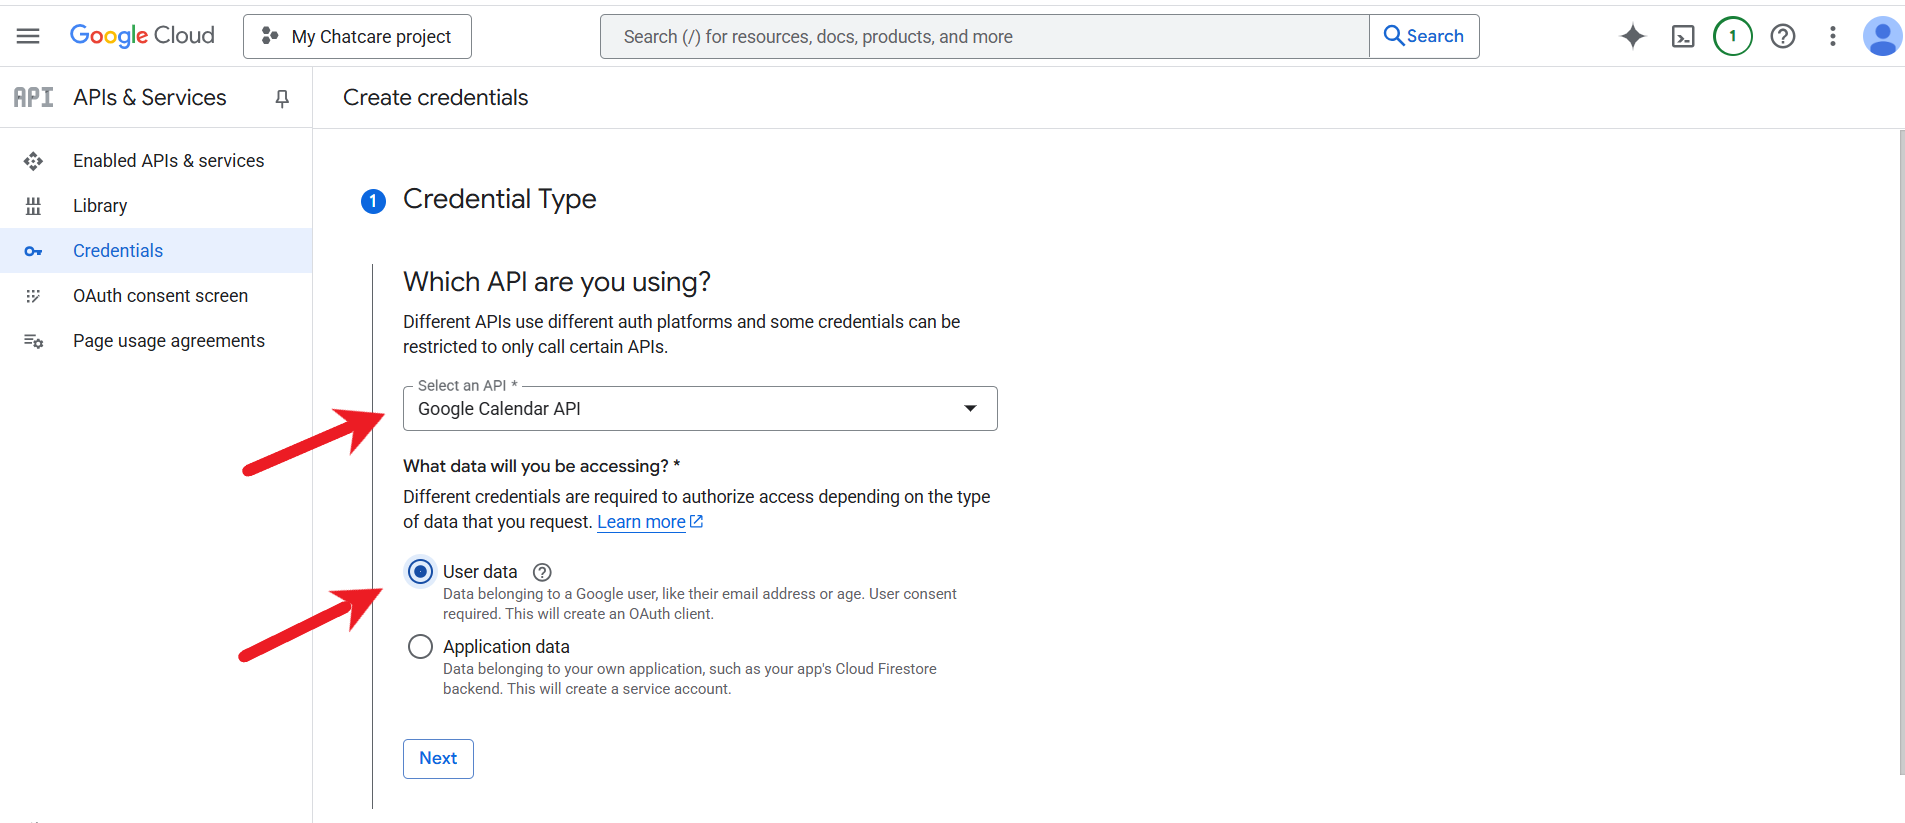
9. Set Google Calendar API as your credential type. Also select ‘user data’ and click ‘Next’.
10. Provide an application name, contact email address and developer contact information. Once done, click ‘Save and continue’.

11. Skip ‘Scope’ and click ‘Save and continue’ to go to the next step.
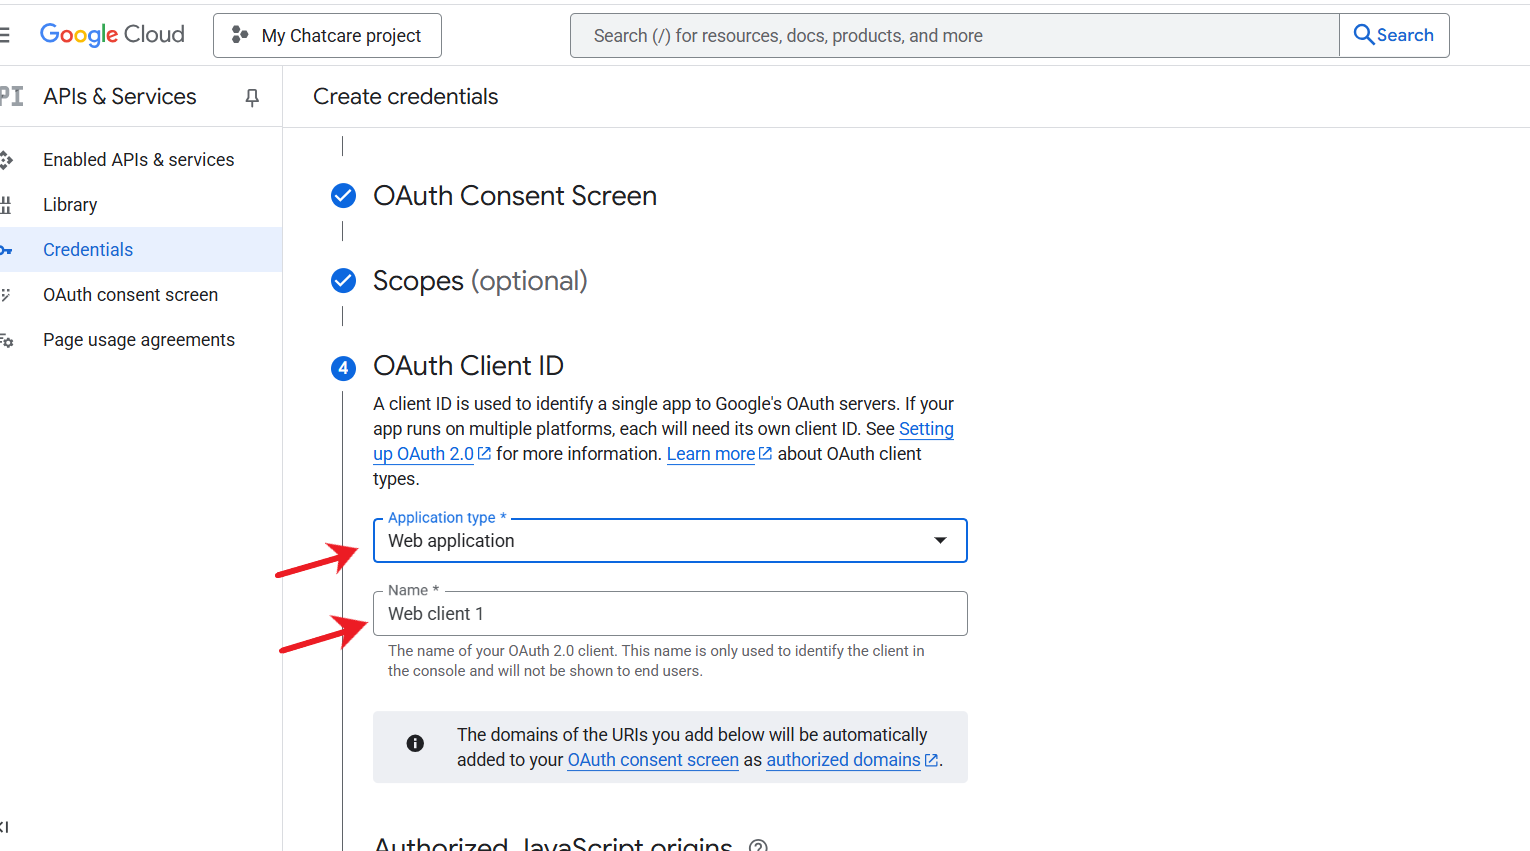
12. In the ‘OAuth client ID’ step, select ‘Web application’ and create a name for it.
13. Scroll down to the ‘Authorized redirect URIs’, click ‘+Add URI’ and paste the below URL https://www.slotahead.com/wp-json/mpa/v1/google-calendar-auth . Then click ‘Create’.

14.Your credentials should be created – click ‘Done’.
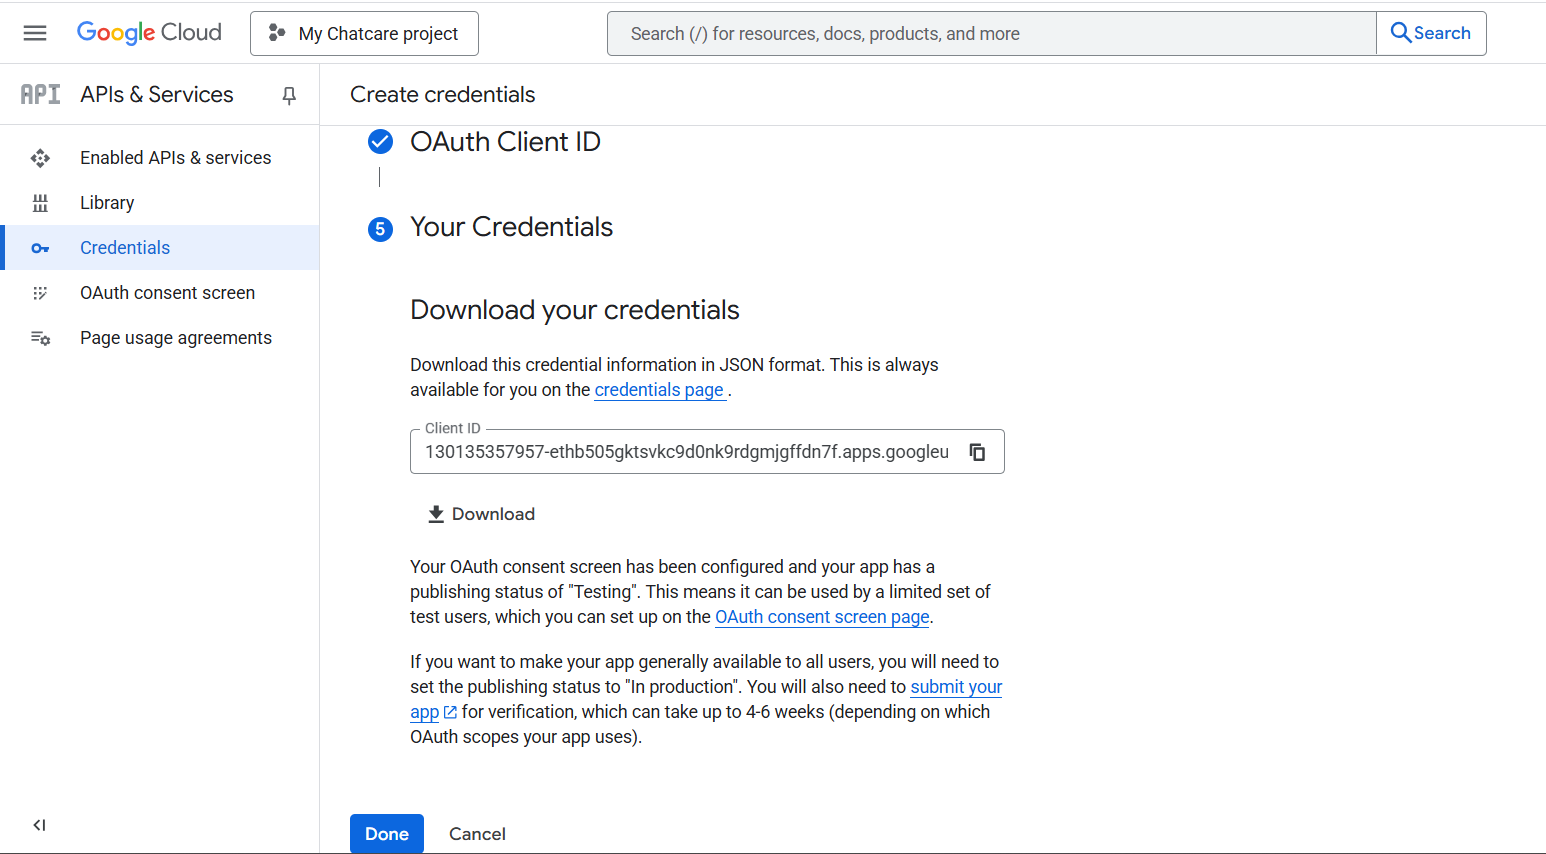
15. Click on the OAuth Consent Screen.
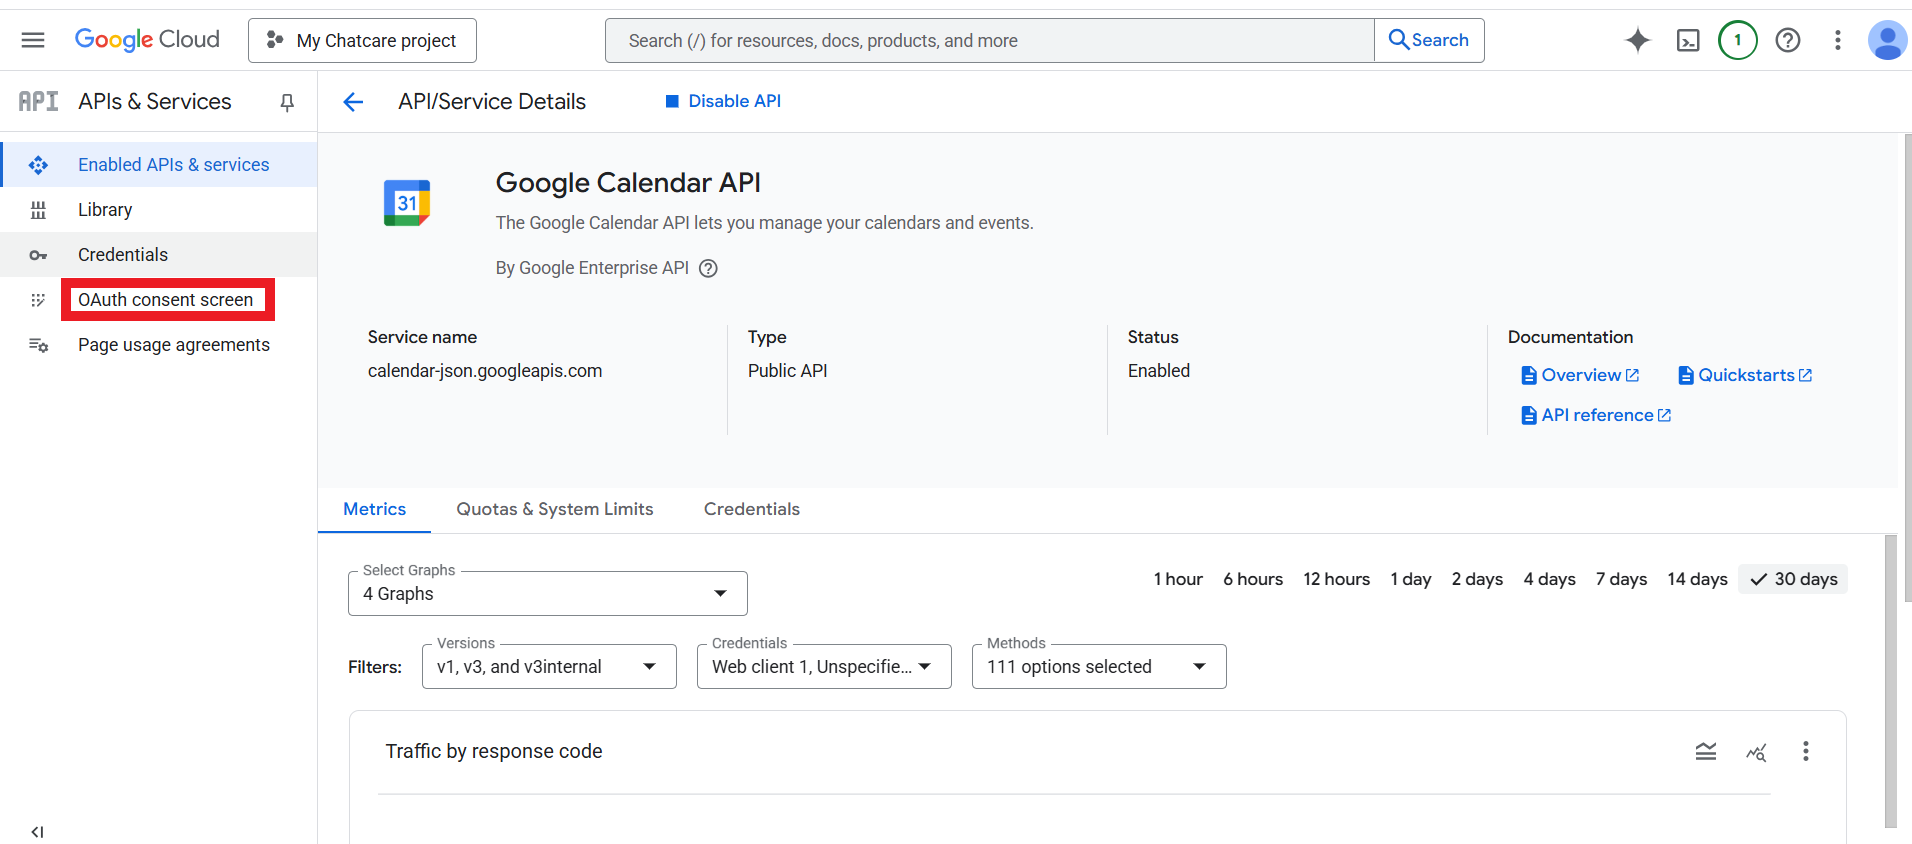
16. Go to the ‘Audience’ menu and click ‘Publish app’.
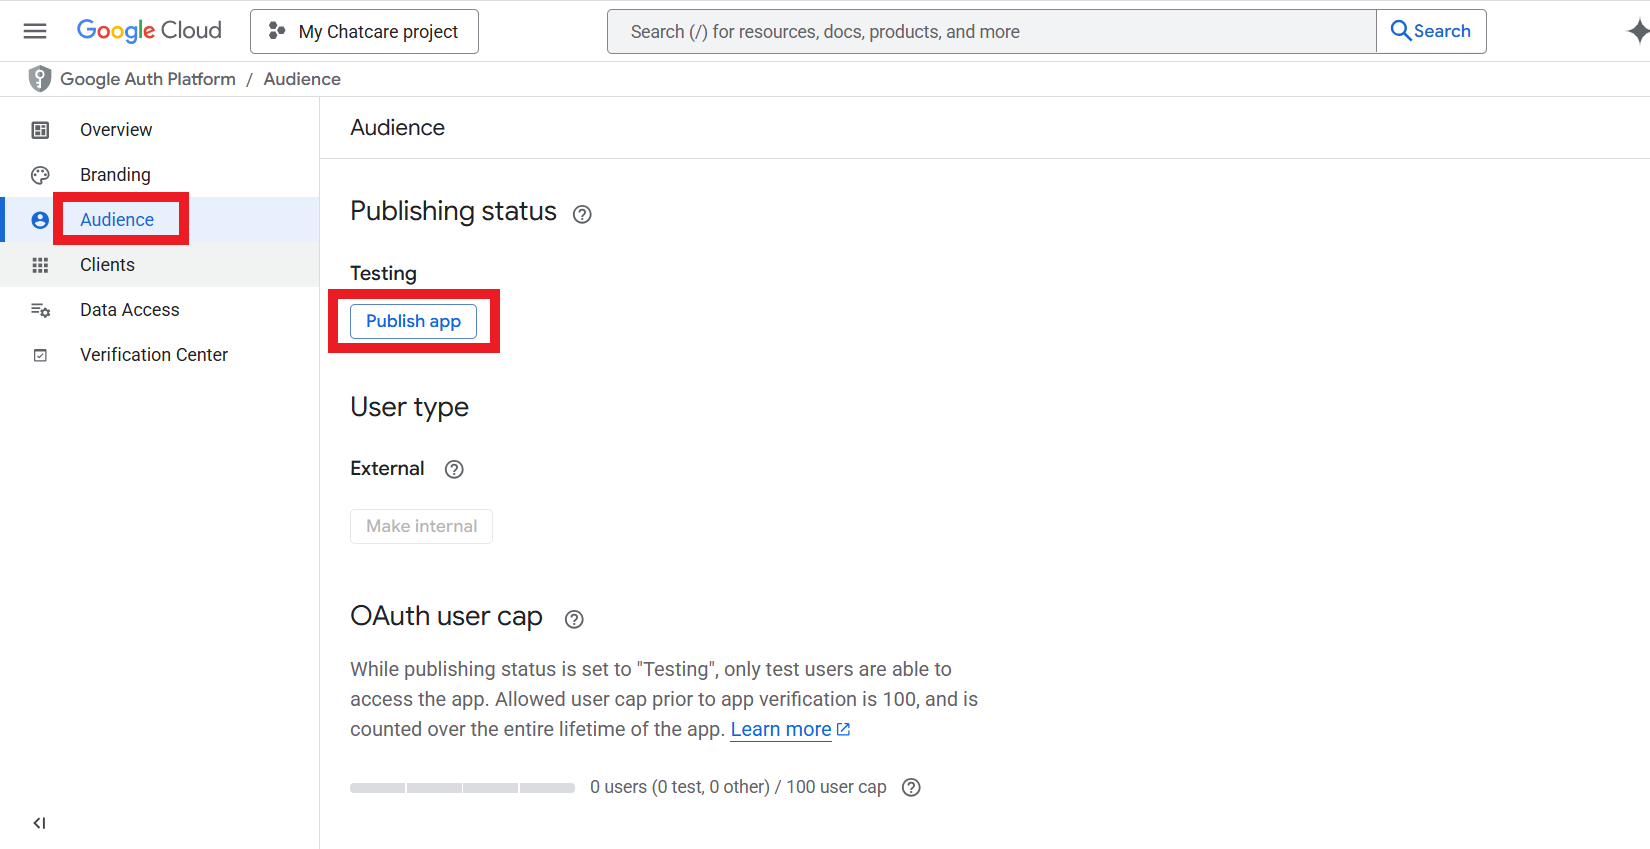
17. In the ‘Push to production?’ pop-up, click ‘Confirm’.
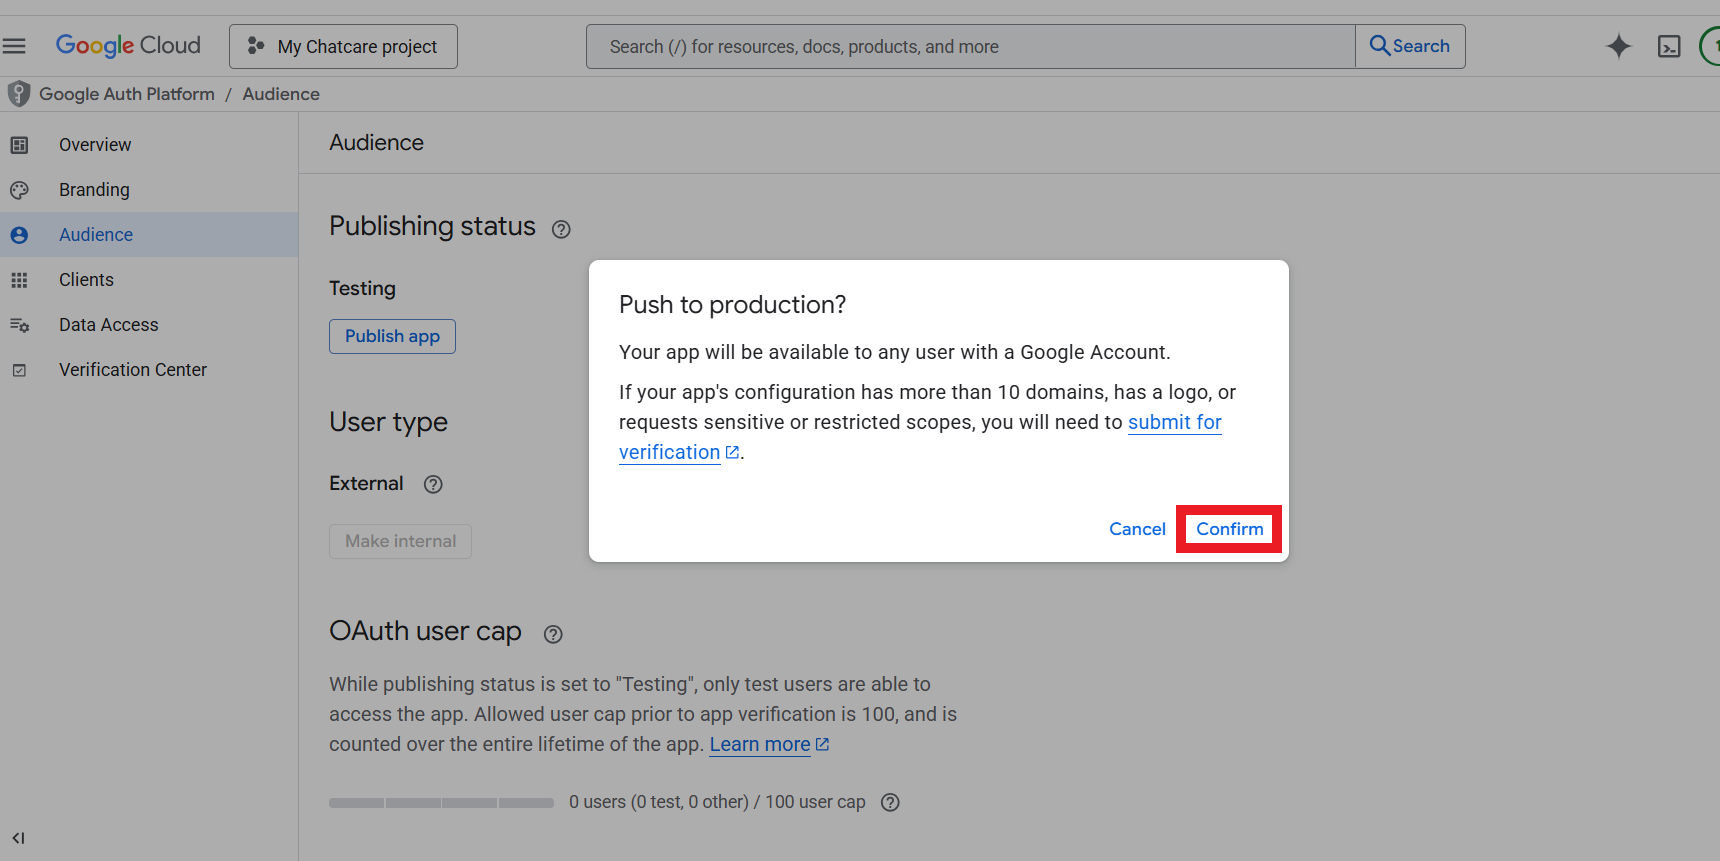
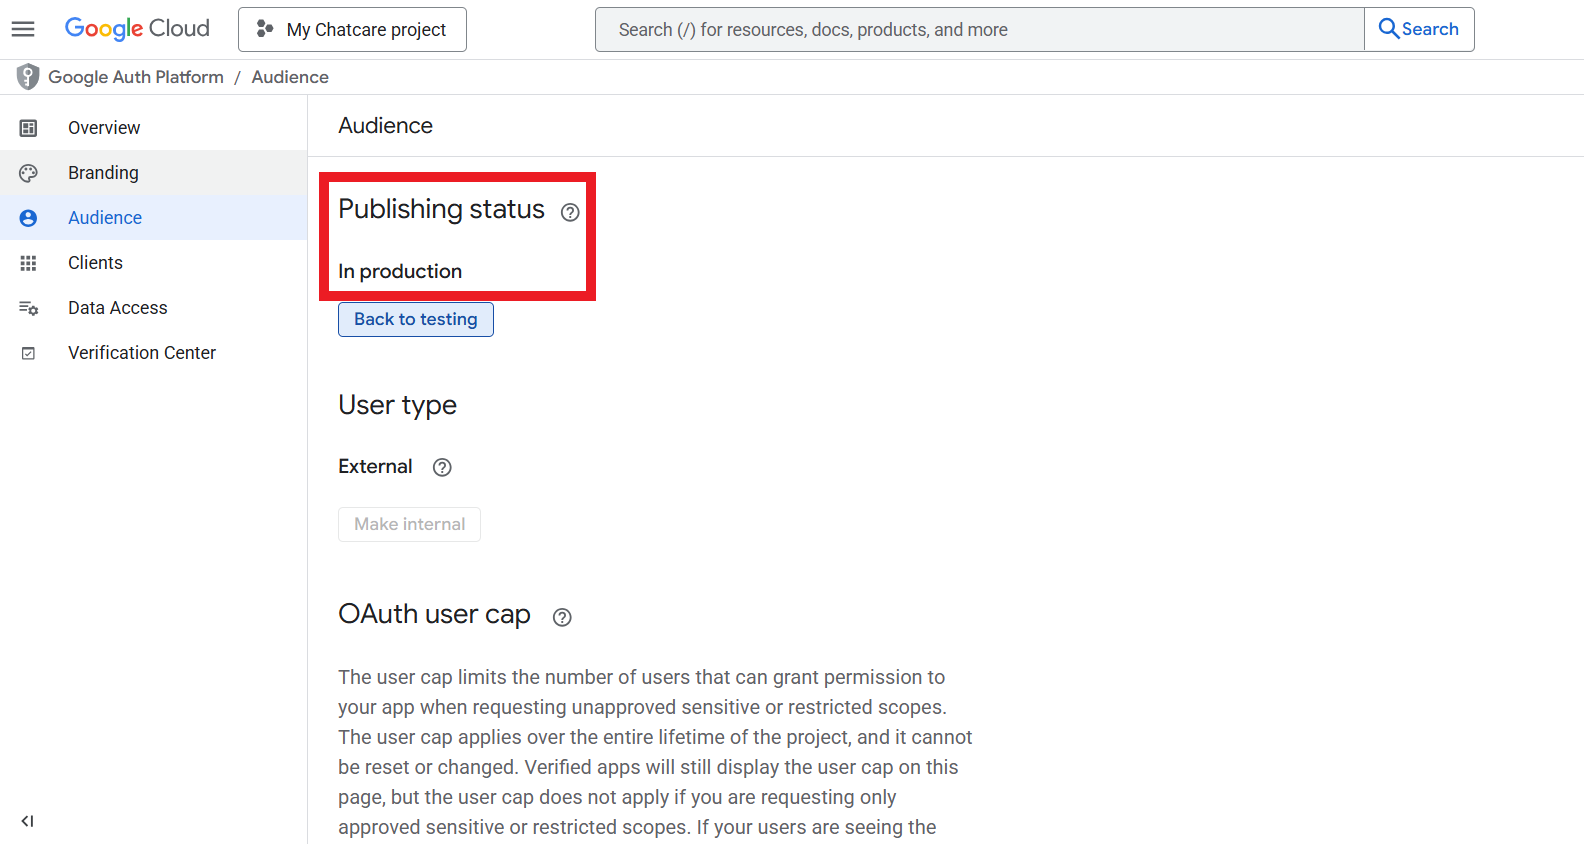
18. The publishing status should change to ‘In production’.
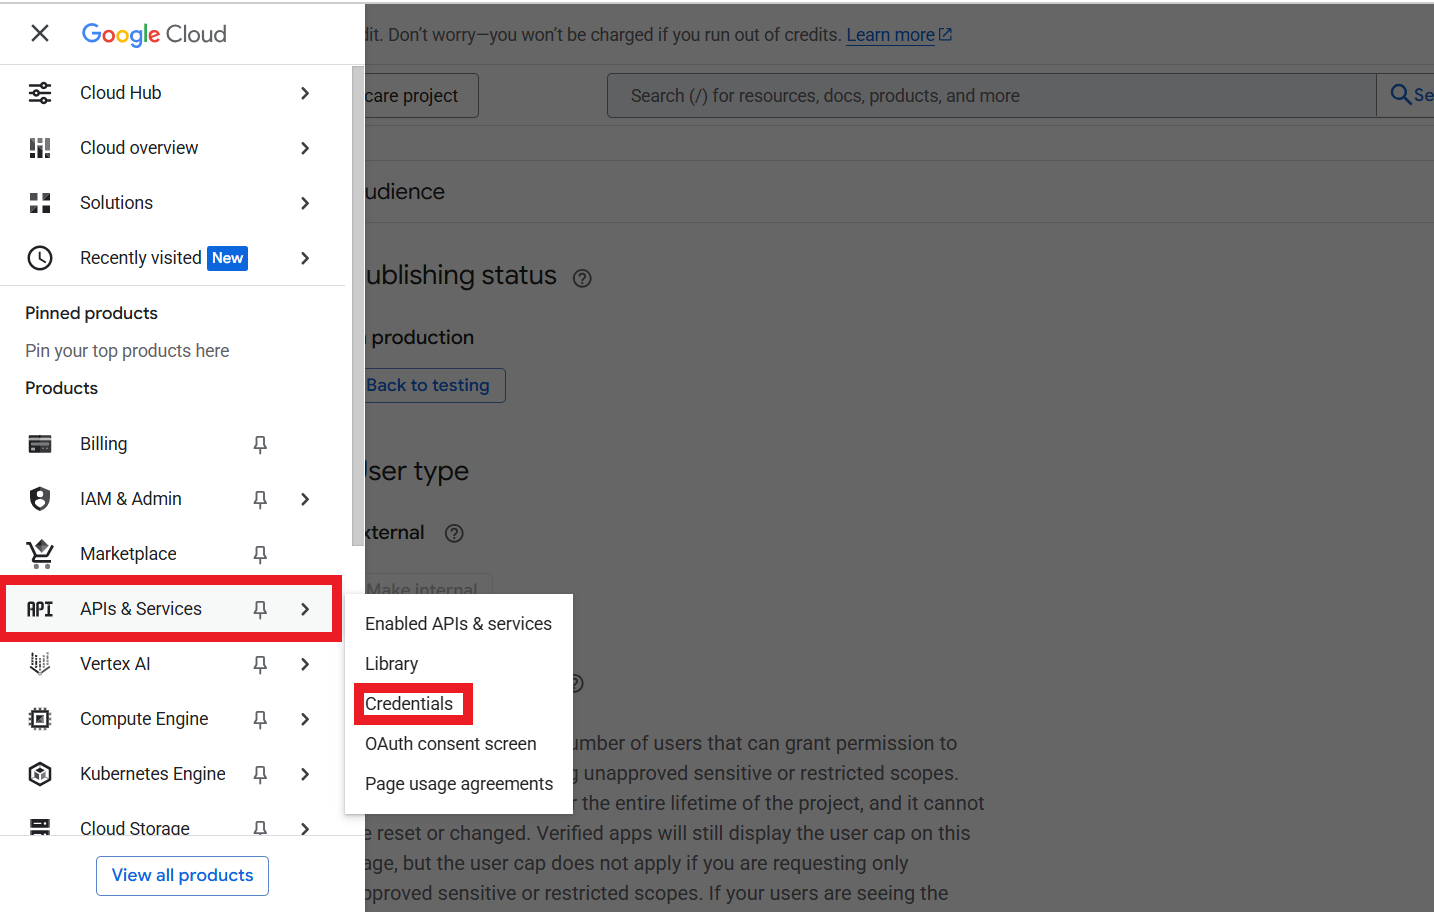
19. Navigate to google cloud hamburger menu, select API & Services and then Credentials.
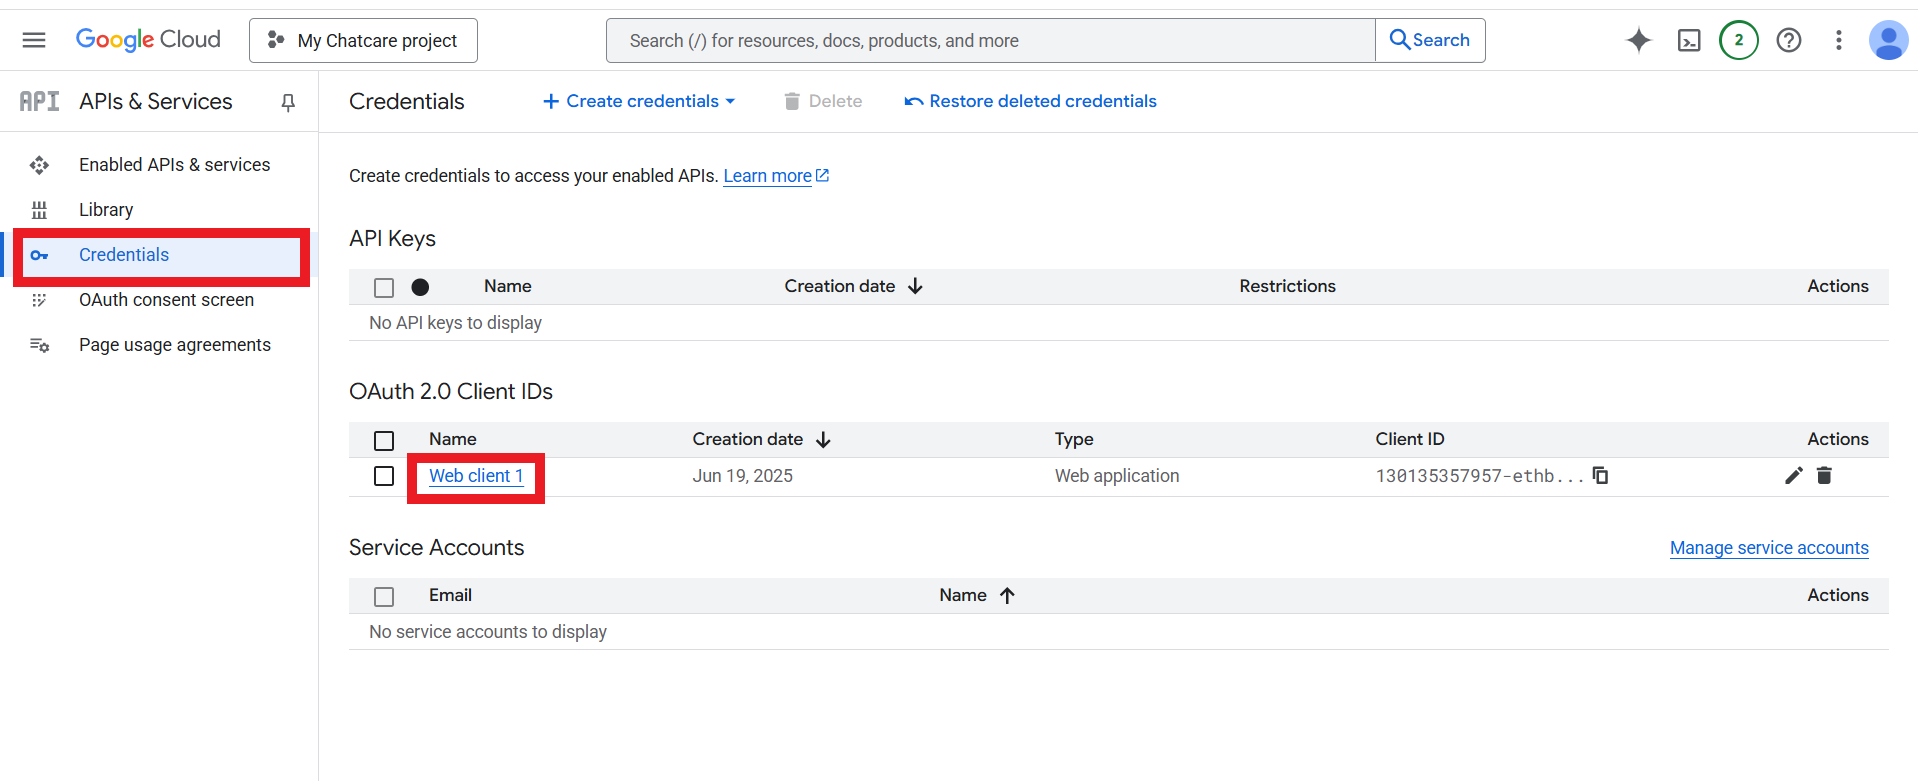
20. click on the newly created application.
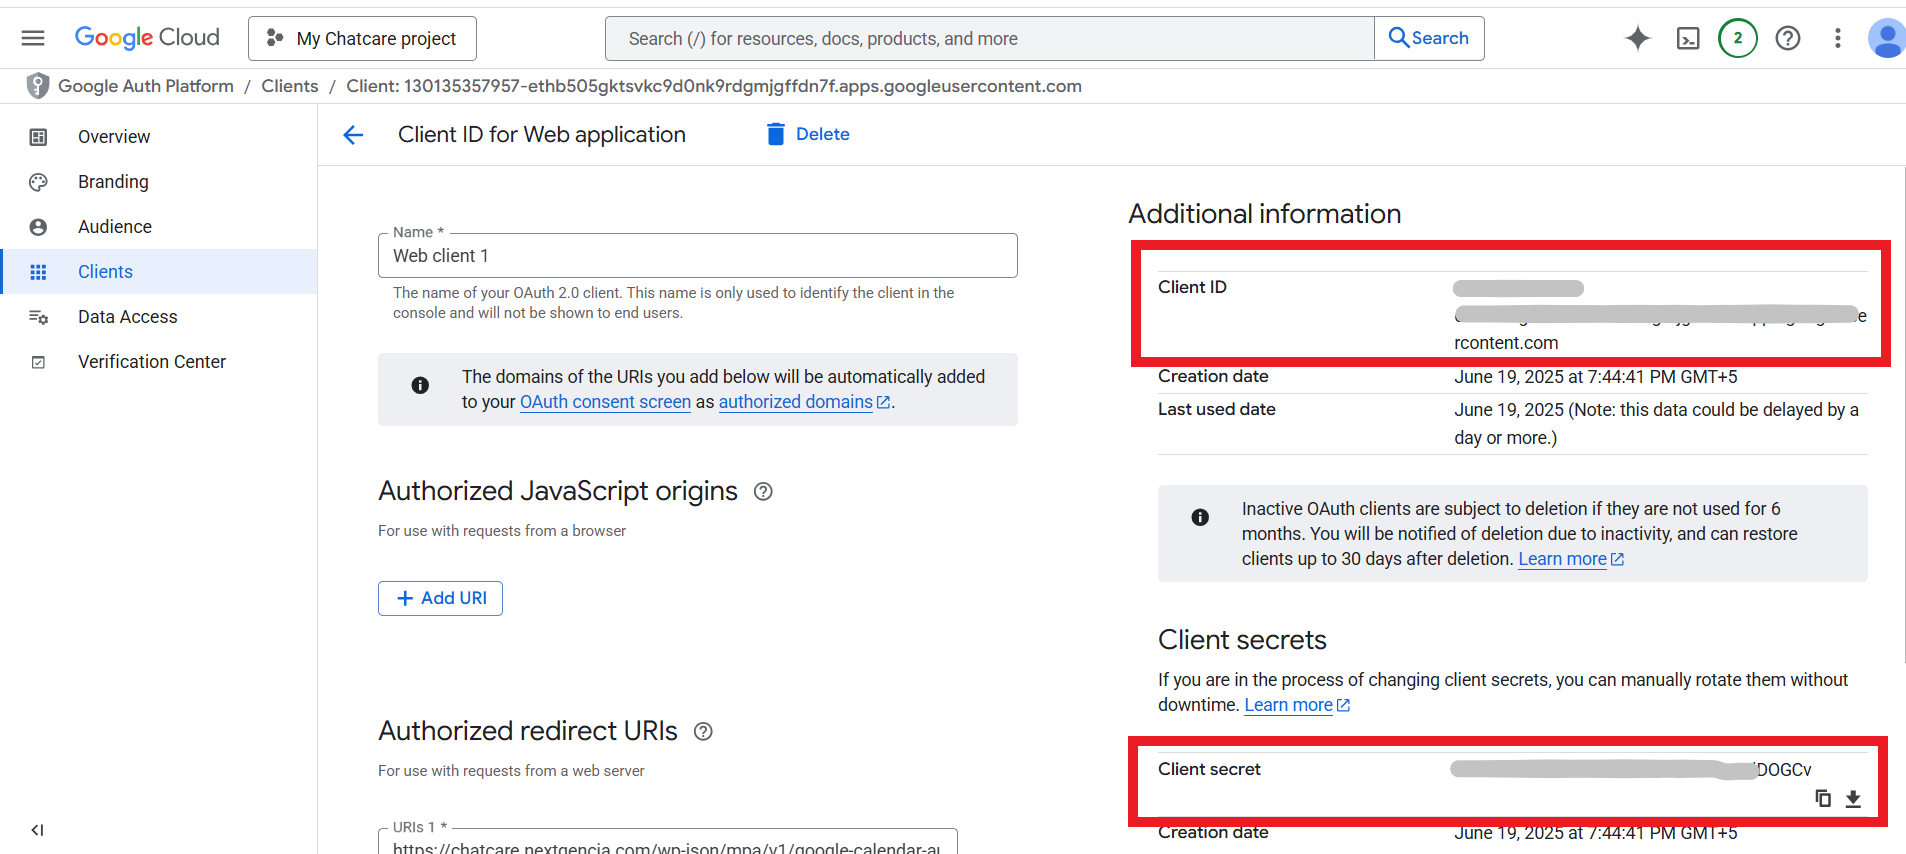
21. Find your Client ID and Client Secret key credentials and copy them.
Note: If you have just completed Step 21, do not continue here. Skip to step 27. These steps (22–26) are only for users who already have the Google calendar API enabled.
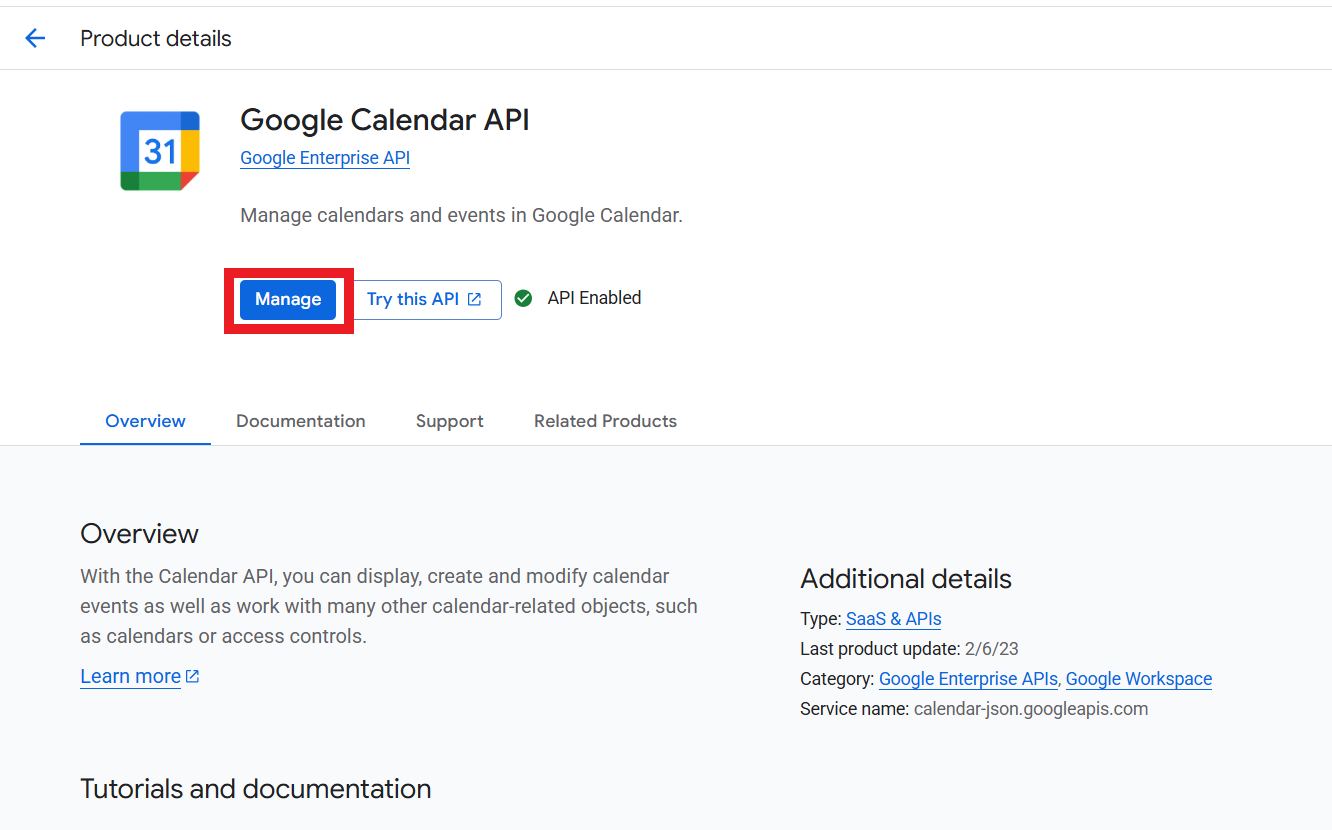
22. Click on manage.
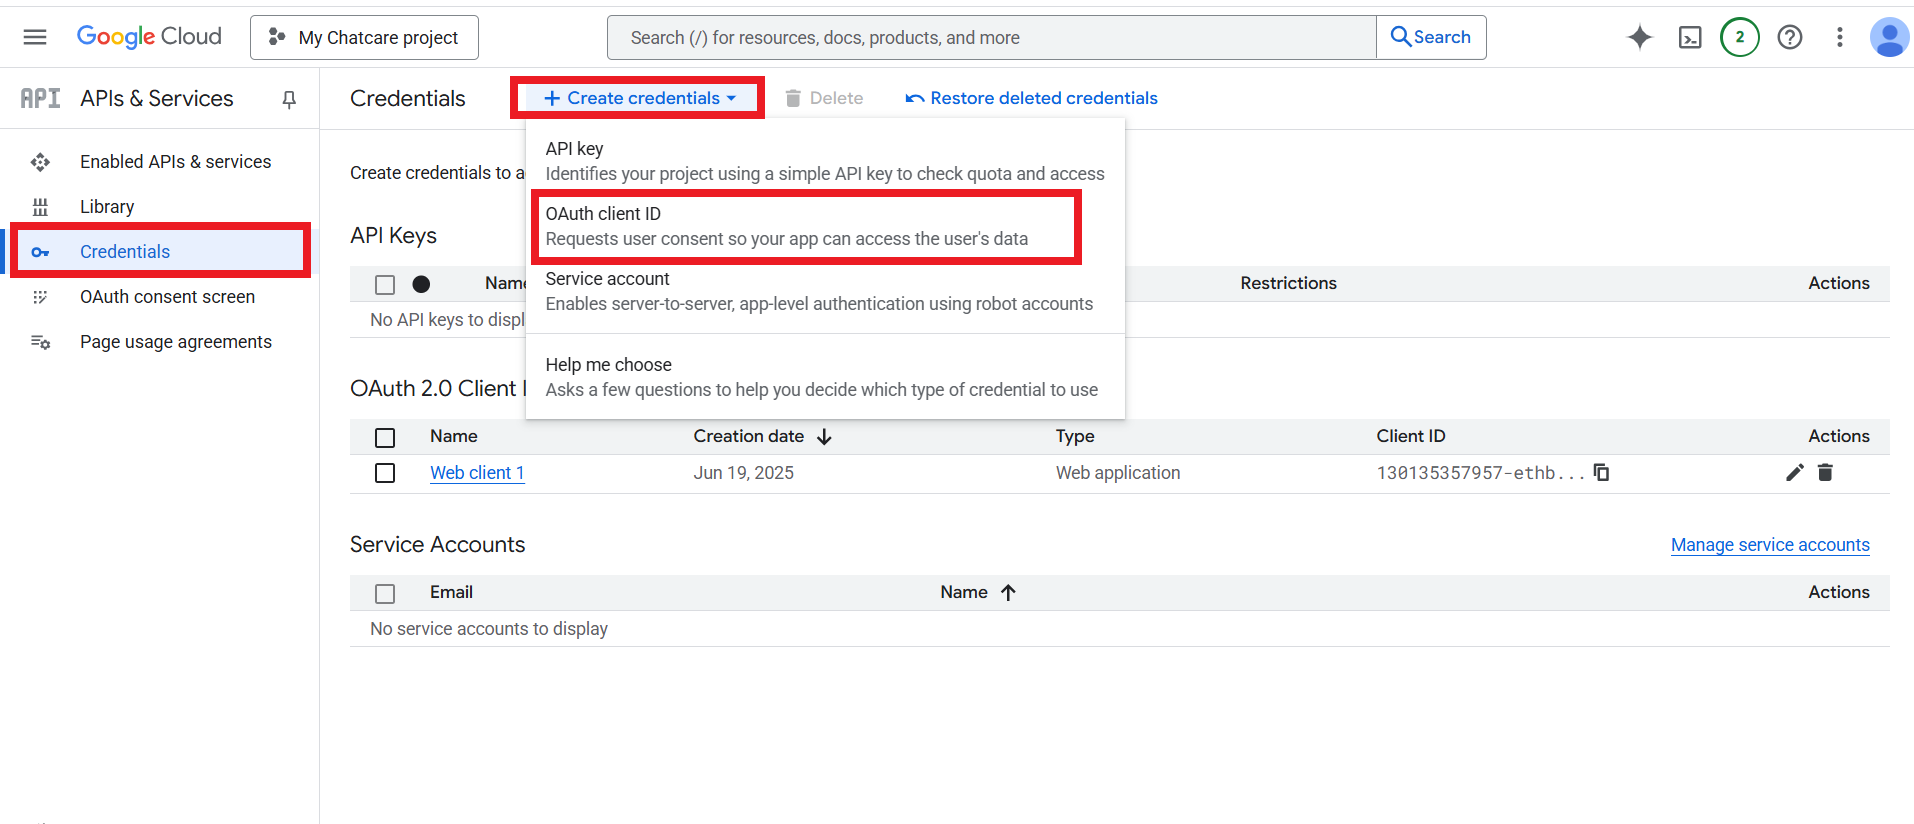
23. From credentials click on Create credentials and select OAuth client ID.
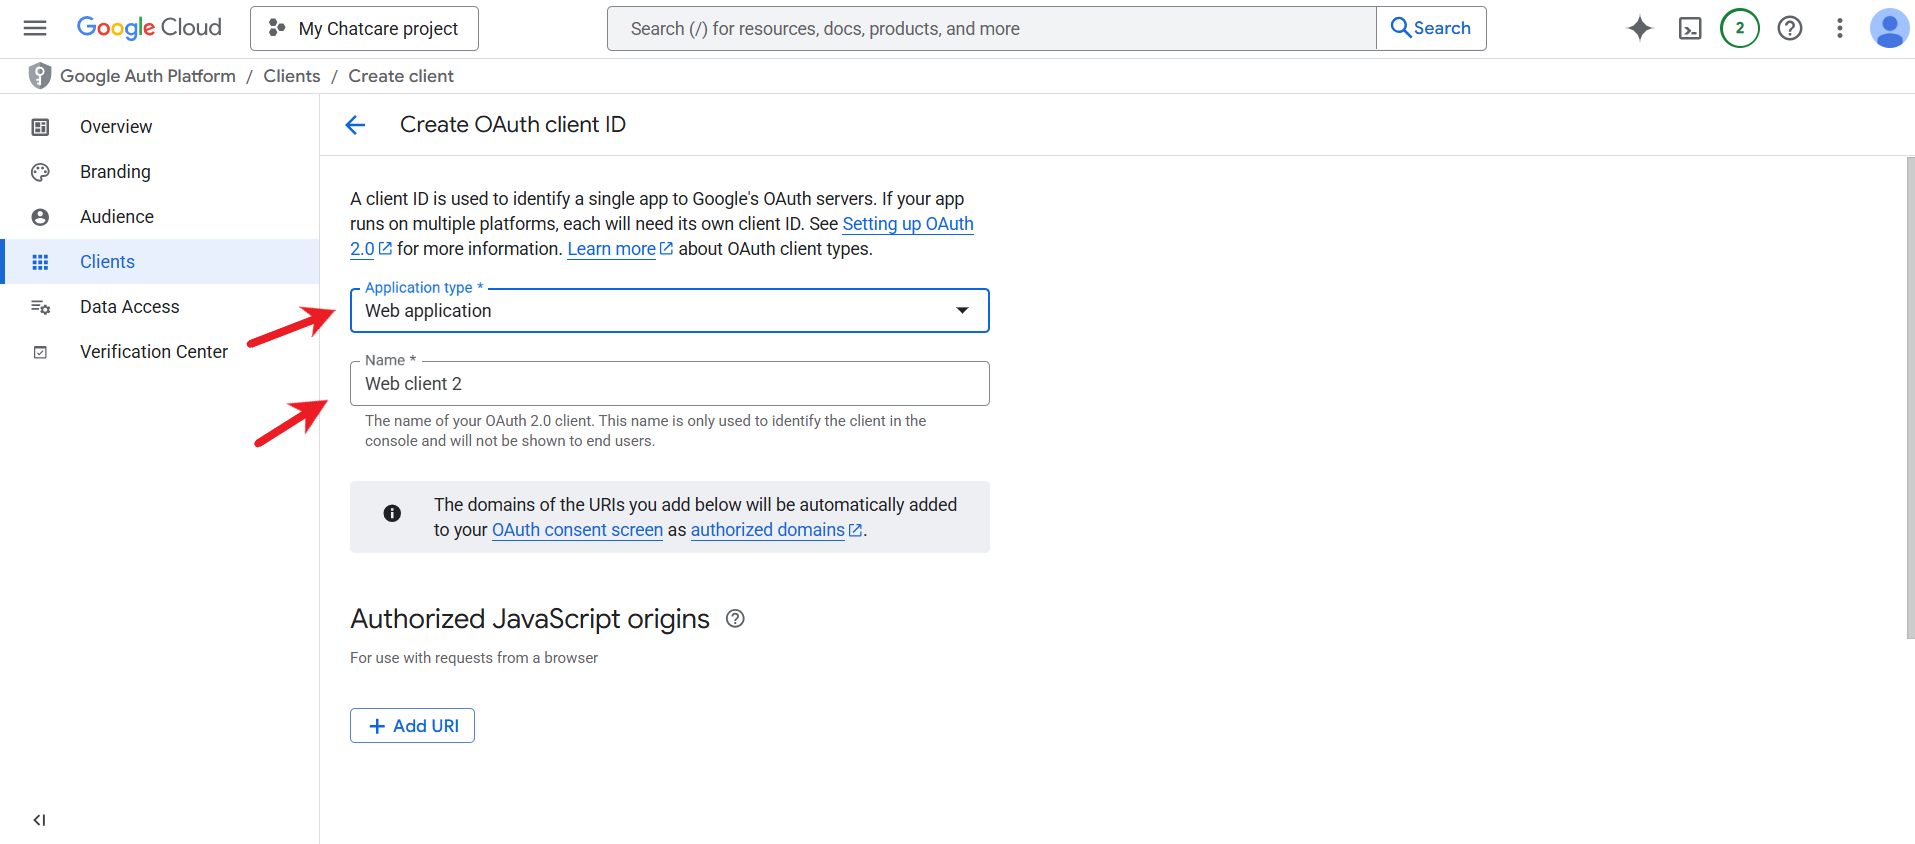
24. In the ‘Create OAuth client ID’ step, select ‘Web application’ and create a name for it.
25. Scroll down to the ‘Authorized redirect URIs’, click ‘+Add URI’ and paste the below URL https://www.slotahead.com/wp-json/mpa/v1/google-calendar-auth. Then click ‘Create’.

26. Get your Client ID and Client Secret key credentials and copy them.
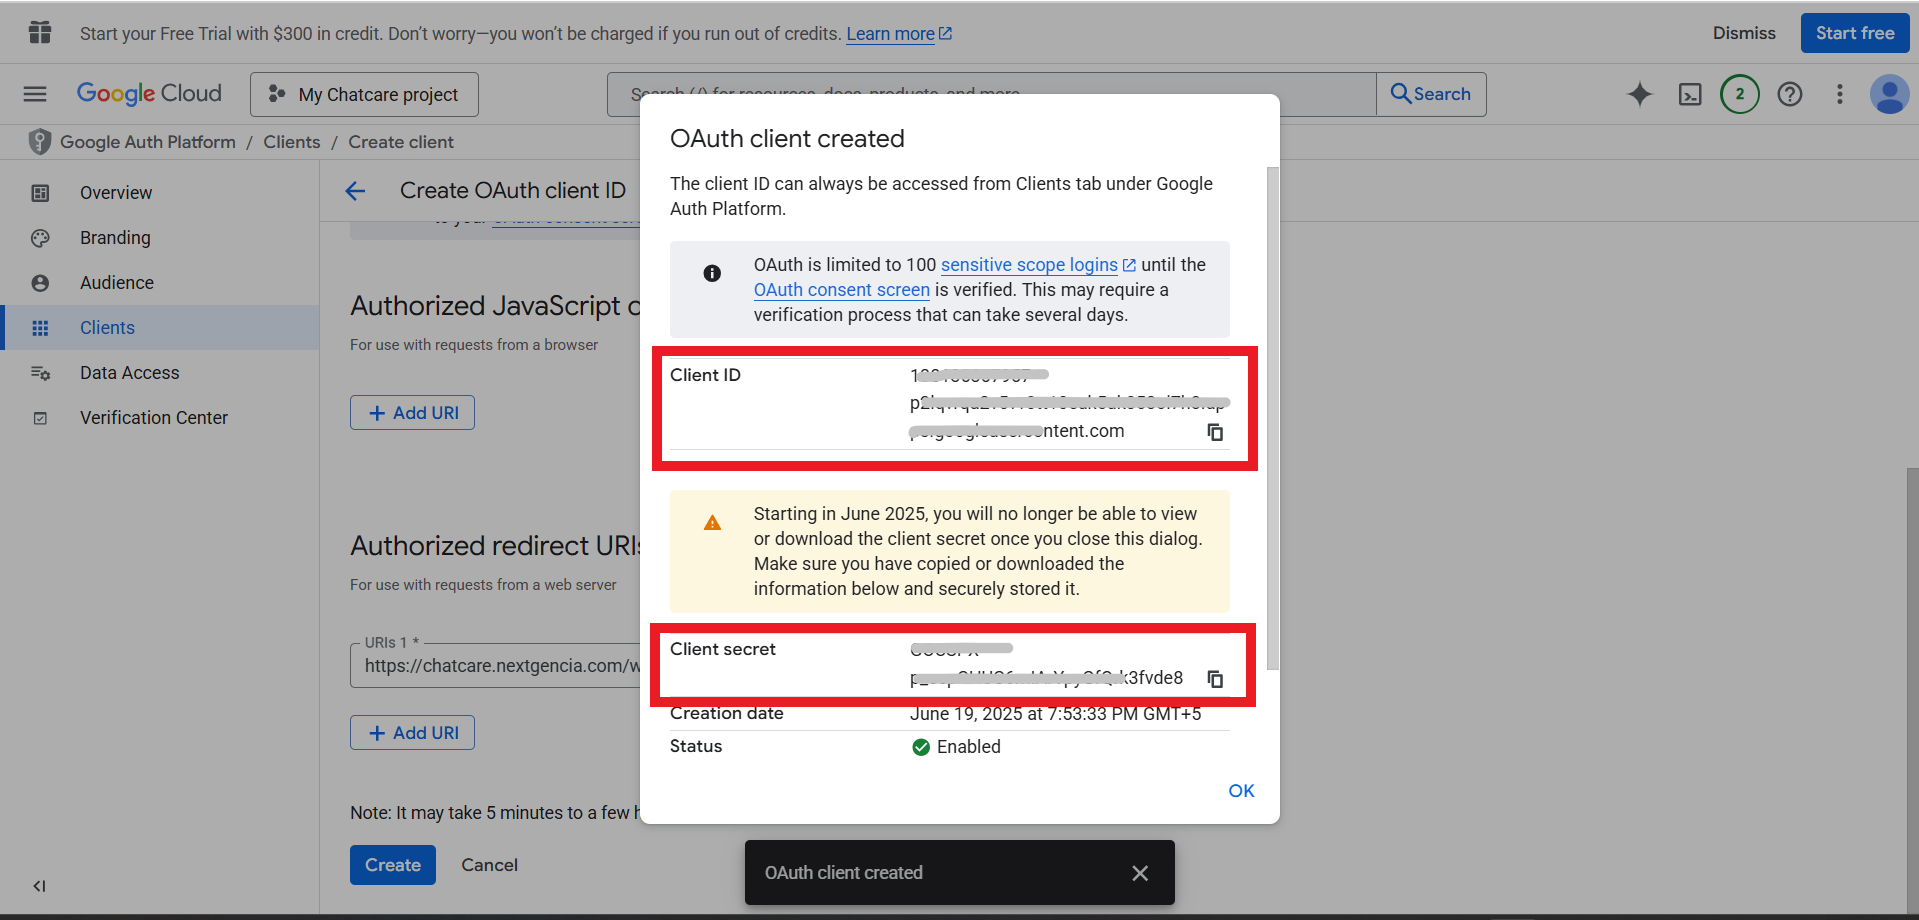
27. Insert the generated credentials into the appropriate fields.

28. Once Google Client ID and Google Client Secret are filled ‘Connect Google Calendar’ is shown. Click on ‘Connect Google Calendar’ button to connect doctor’s profile to their Google Calendar.

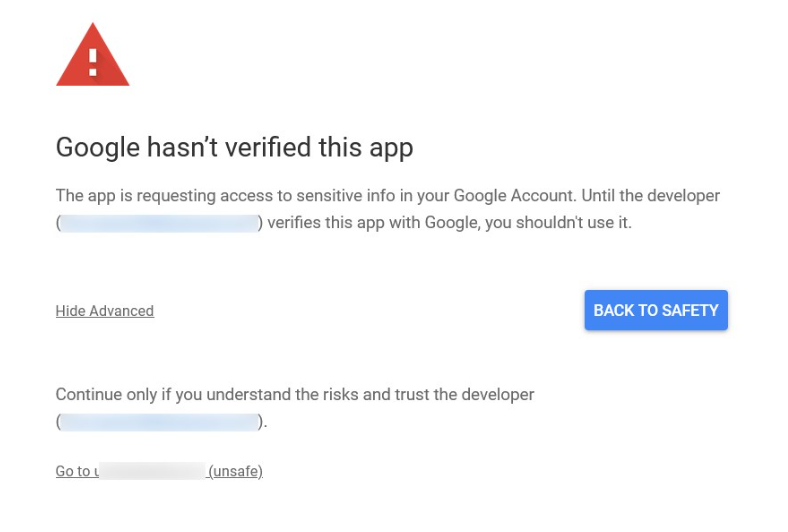
29. By hitting on that button, a popup will appear that redirects to their Google account for confirmation. There are chances Google will mark this app as not verified. It’s fine, they just need to hit “Advance” and then “Go to <your domain>”. It’s still secure to log in this way since your employees know you and that your website is verified. They need to click ‘Continue’ to access your site.
30. Once the connection is successful, the popup closes, and they’ll see that ‘Calendar Connected’. Also ‘Sync’ button which on clicking will sync the zocdoc appointments already in the doctor’s google calendar with the website.
